Setting up your Windows 10 computer to connect to My Private Network’s VPN should take just a few minutes using the PPTP protocol. Please note that your computer needs to be connected to the Internet and able to browse the web before moving on with the instructions below.
While we recommend using our SSL OpenVPN application as the first option to connect to our service on Windows 10, there might be some cases where this might not work well on your network. In this case, you can try this alternative PPTP VPN connection, which is much easier to setup compared to the other protocols.
Not yet registered? It’s quick and easy, Sign Up now!
Check Internet Connectivity
Make sure your system is connected to the internet and that you are able to browse the web. To check your location, please go to our IP Info page.
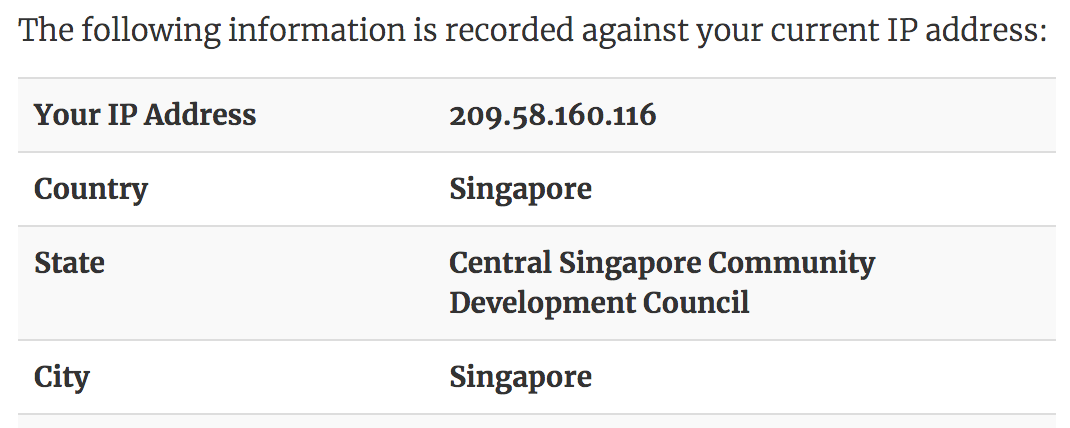
This shows the IP Address and country that you are currently connecting from, in this example, the user is connecting from Singapore.
Getting Started
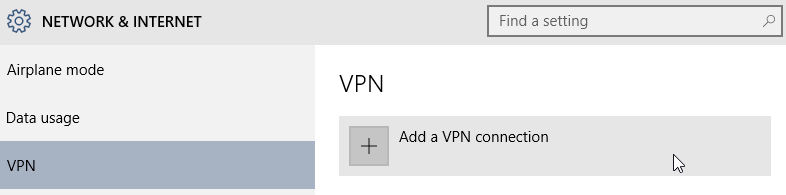
From your desktop screen, click on the Network icon which can be found at the bottom right hand corner of your screen and click on Network Settings.

Navigate to VPN and click on Add A VPN Connection.
L2TP Connection Configuration
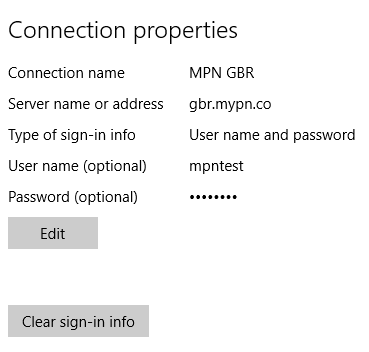
Now enter the VPN details as below:

VPN provider: Windows (built-in)
Connection name: MPN GBR
Server name or address: gbr.mypn.co (assuming you’re setting up a VPN connection to the U.K)
VPN type: Point to Point Tunneling Protocol (PPTP)
Note: If you wish to use our Free service, the servername that you need to use is fre.mypn.co and your connection will be rotated between different countries we have in our Free VPN cluster.
To connect to any of our other servers, (ie. our USA servers) simply change the Server name and rename the Connection name to reflect another location. For a list of server names, please refer to our complete list of servers here.
VPN Authentication Settings
You will now be asked for your My Private Network Username and Password, these are the same details that you registered with us.
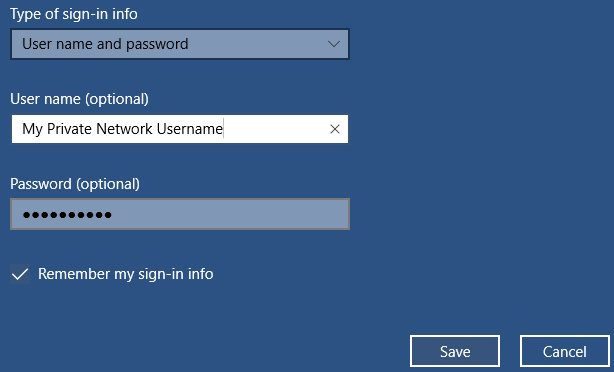
Type of sign-in info : User name and password
User name : “Your My Private Network Username”
Password : “Your My Private Network Password”
Tick the Remember my sign-in info if you wish to have the details saved in the system and click on Save.
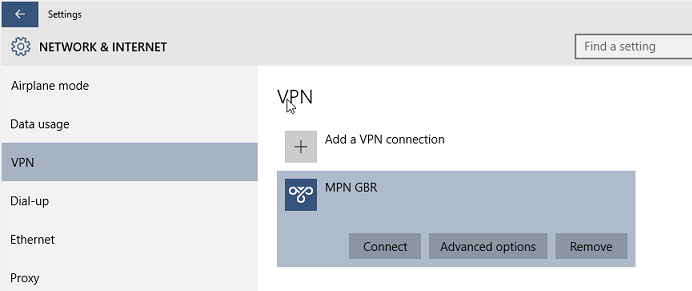
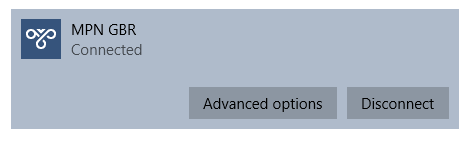
You should now able to see the MPN GBR icon at the VPN section.
Don’t Have a VPN yet? give our Free Trial a go by clicking the button below for 3 full days of unlimited access to both our VPN and MyTelly services.
Enabling VPN Connection
Return back to the Network Menu and select the VPN connection that you have just created and click on Connect.
The VPN will now attempt to connect to our service and if successful, the VPN status will change to Connected.
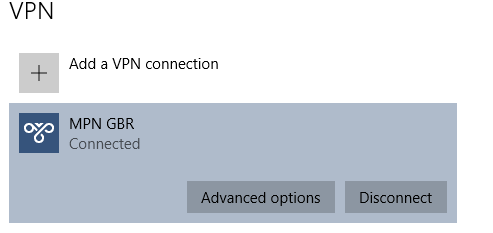
You should also be able to see the status of the VPN connection from the Network icon on your taskbar.
![]()
If you now check your IP address again from the IP Info page, your location should show that you are now in the U.K (or which ever country you have connected to).
Need to Change Something?
If you entered the wrong username and password or you want to change the server name, just select the VPN connection again and click on Advanced Option.
Now click on Edit to update your credentials, server name or the VPN settings.
Any Problems?
Unfortunately it doesn’t always go to plan!
If you have any problems or can’t get connected, please email us at This e-mail address is being protected from spambots. You need JavaScript enabled to view it
. We’ll get back to you as soon as possible and try to help.