Setting up your Linux Ubuntu computer to connect to My Private Network’s VPN should take just a few minutes using our OpenVPN application. Our app connects to the VPN via the SSL protocol. Please note that your Linux Ubuntu computer needs to be connected to the Internet and able to browse the web before moving on with the instructions below. The steps below are for Linux Ubuntu 16.04 (Xenial Xerus) but the steps should apply to most Debian based Linux systems.
Using a different version of Linux? Select your correct Linux distro for the SSL OpenVPN setup below:
Linux Mint OpenVPN Setup
Linux Fedora OpenVPN Setup
Not yet registered? It’s quick and easy, Sign Up now!
Check Internet Connectivity
Make sure your system is connected to the internet and that you are able to browse the web. To check your location, please go to our IP Info page.
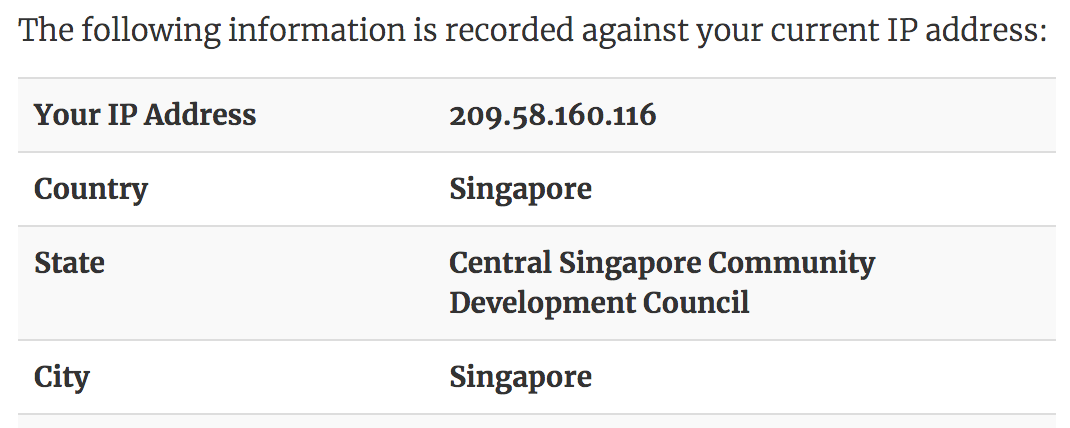
This shows the IP Address and country that you are currently connecting from, in this example, the user is connecting from Singapore.
Getting Started
First of all, please ensure that the OpenVPN package that is installed on your system is the latest one, or at least on version 2.3.4 for our OpenVPN connection to work.
If you are on Ubuntu 15.10 (Wily) and above, the packaged OpenVPN for these releases should work with our updated configurations. To check this, please open your Terminal and type;
openvpn – -version

Look at the output and if it’s on OpenVPN 2.3.4 and higher, proceed with the steps below.
NOTE: If you do not have the OpenVPN package installed, please refer to our knowledge base article below on how to install and update the OpenVPN version on your system.
How to update OpenVPN package for Linux (Debian)
Installing OpenVPN Plugin
Please launch Terminal which you can access via Applications -> Accessories -> Terminal
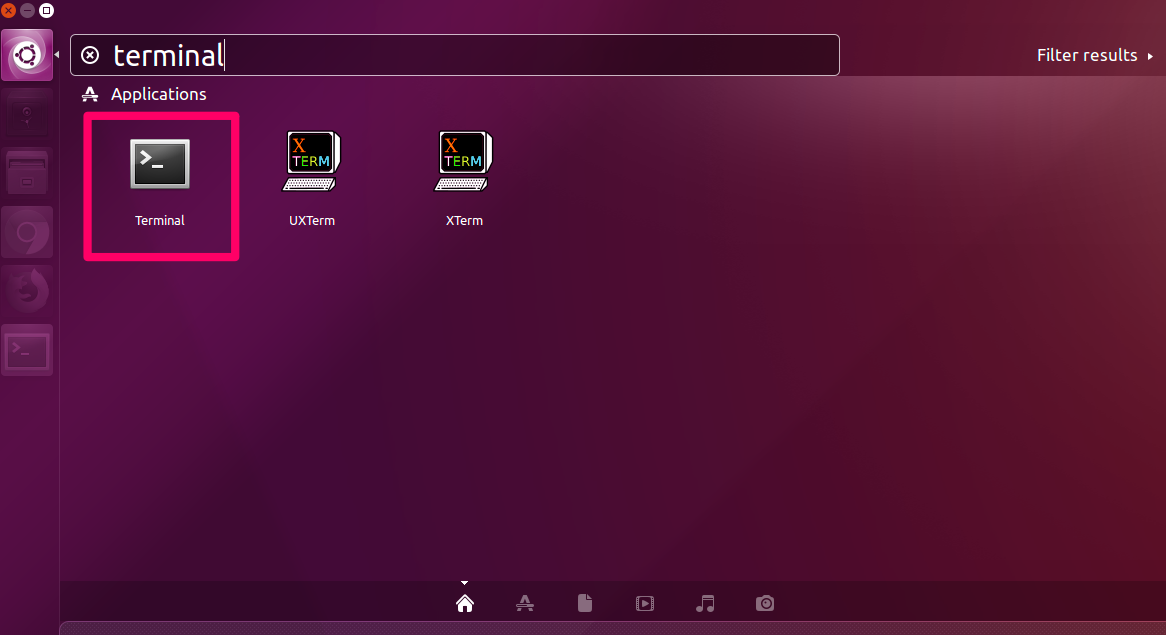
Run the following command below to install all the OpenVPN dependencies.
sudo apt-get install network-manager-openvpn-gnome

Note: If the above command doesn’t work, try running the commands below before running the commands above again.
sudo add-apt-repository universe
sudo apt-get update
You will be prompted: Do you want to continue? [Y/n]. Type Y and hit Enter. Once installation is complete, restart Network Manager by typing:
sudo service network-manager restart
Download Configuration File(s)
Download the OpenVPN configuration files from the link below. Please choose the appropriate configuration(s) based on your plan. i.e. If you’re subscribed to our U.K plan, you will need to download our MPN_GBR.ovpn configuration file. You can check what file corresponds to which server from our list here.
Note: If you wish to use our Free service, the configuration file that you need to use is MPN_FRE.ovpn and your connection will be rotated between different countries we have in our Free VPN cluster.
OpenVPN Configuration file(s) Download
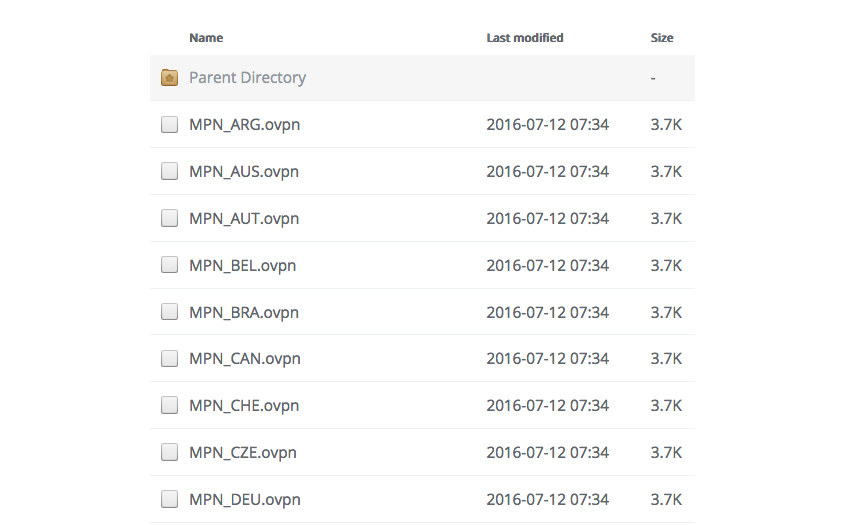
Note: You may need to right click on the link(s) and choose Save Link As to save the file(s) on your system.
Installing Configuration File(s)
Head back to your desktop and select the Network Manager icon in the top right hand corner and choose Edit Connections.
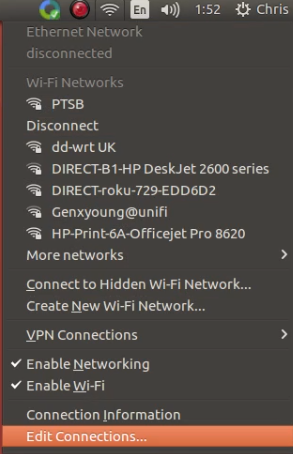
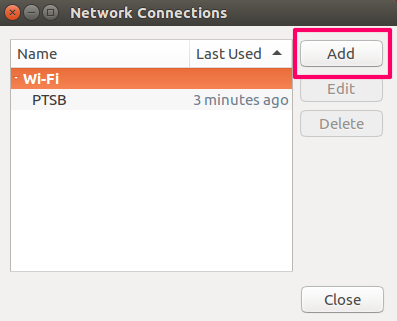
Click on Add to create the new VPN connection.
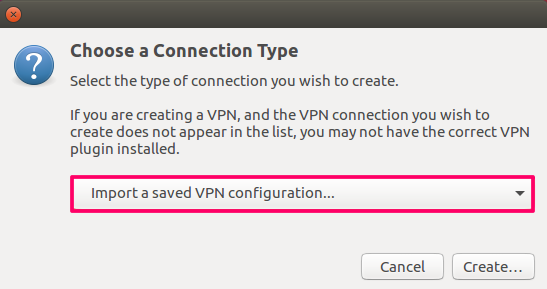
Select Import a saved VPN configuration from the drop down list and click Create.
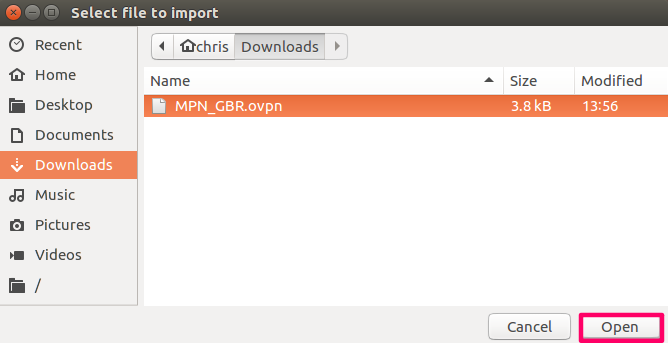
Now, select the VPN configuration file(s) that you’ve downloaded earlier and click on Open. In this example, I’ve downloaded our MPN GBR file.
Enter your VPN Username and Password
You are now required to enter your VPN username and Password.
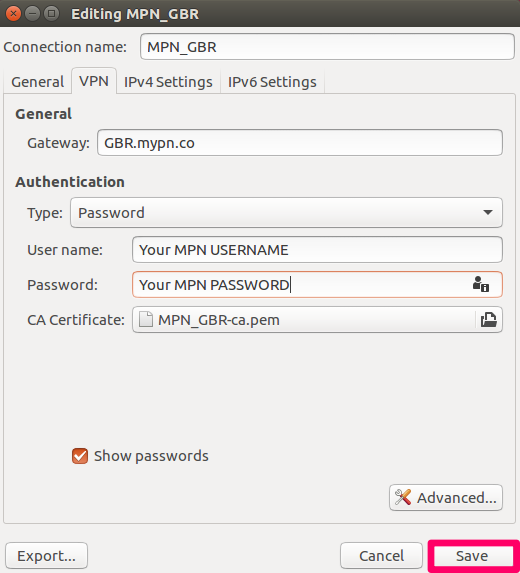
Once you’ve entered your account details, click on Save.
Enabling VPN Connection
In the icon area in the top right of the screen, select the Network Manager icon again.
Choose VPN Connections and click on the connection you have just created. i.e. MPN_GBR
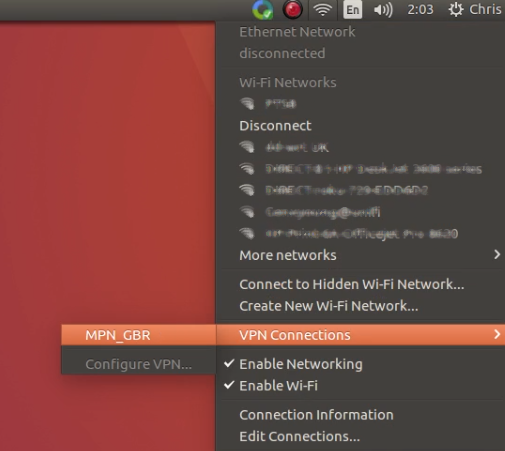
The Network Manager icon will animate for a while before showing a little padlock icon on it to indicate that the VPN is now connected.

Check your IP Address
If you now check your IP address again from the IP Info page, your location should show that you are now in the U.K (or which ever country you have connected to).
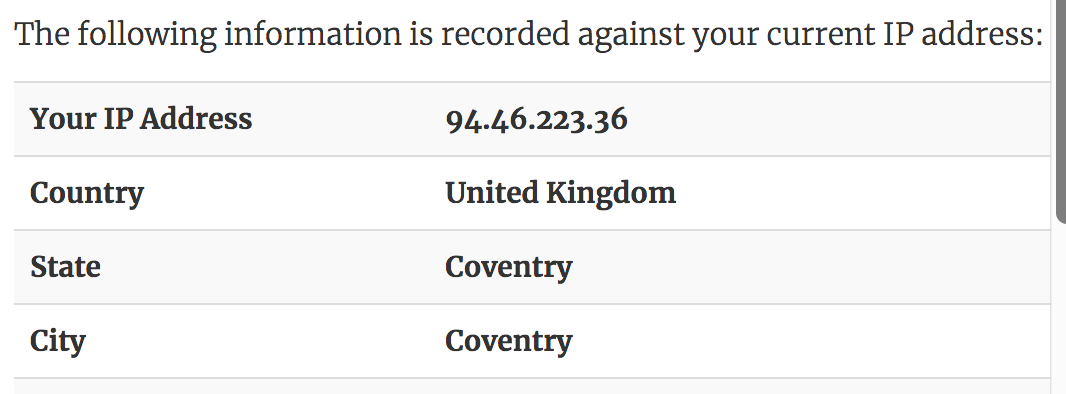
Note: the server IP address and country name will vary depending on the server or country you are connected to.
That’s it! You are now connected. All your internet traffic will now be transmitted securely via our VPN servers through the country you had configured.
Any Problems?
Unfortunately it doesn’t always go to plan! If you have any problems or can’t get connected, first please reboot your system and see if that resolves the problem.
Failing that, please type this command into your Terminal and run the VPN to gather your connection log:
tail -f /var/log/syslog
Take a screenshot of the connection log and email us at This e-mail address is being protected from spambots. You need JavaScript enabled to view it and we’ll get back to you as soon as possible to assist you.