Setting up your Kindle Fire to connect to My Private Network’s VPN should take just a few minutes using our Kindle Fire VPN manager app from the Amazon App Store. Our app connects to the VPN via the OpenVPN SSL protocol with options for UDP 1194, UDP 4096, TCP 443, and TCP 1194. Please note that your device needs to be connected to the Internet and able to browse the web before moving on with the instructions below.
Not yet registered? It’s quick and easy, Sign Up now!
Download My Private Network VPN App
Click on the Amazon App Store icon below from your Kindle Fire to download the MPN VPN Manager App.
![]()
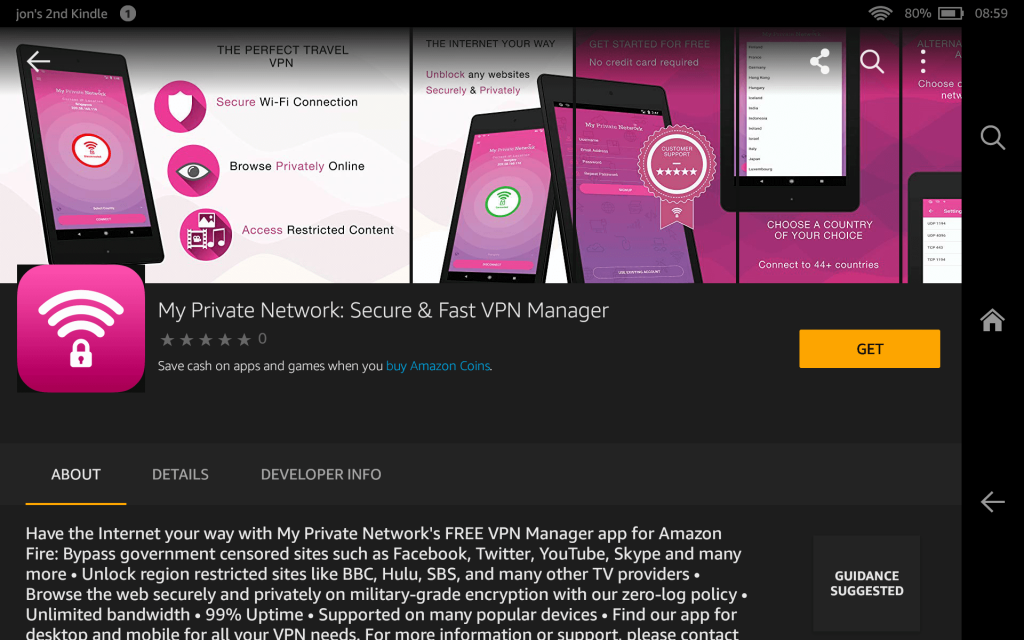
Click on the Get button to install the app.
Login to the VPN app
When you launch the app for the first time, you will need to enter your VPN Username and Password that you used to subscribe with us. If you haven’t done so, click here to Sign Up.
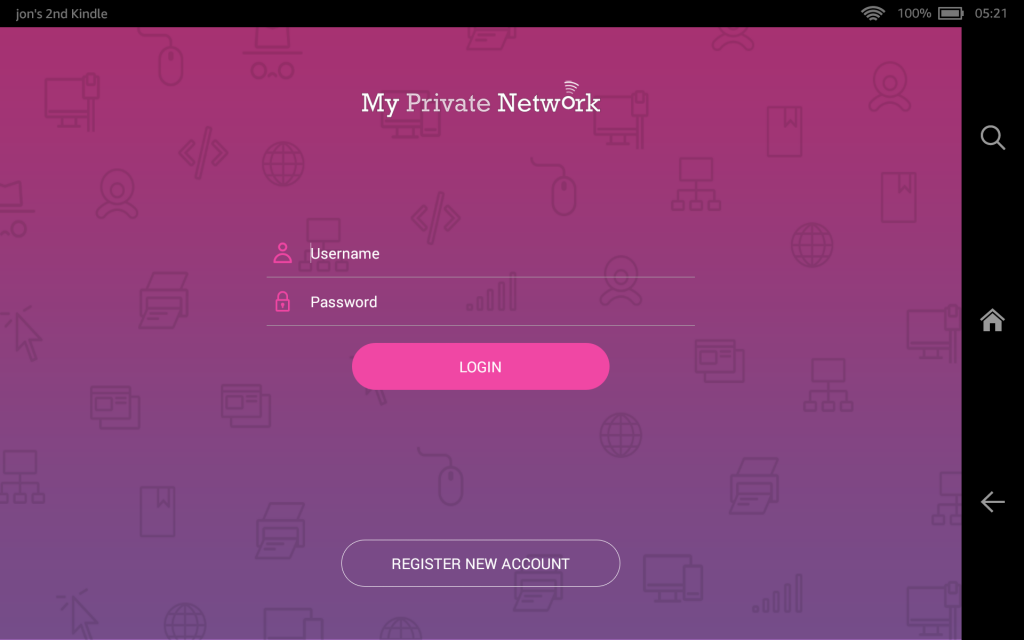
Enter your VPN Username and Password. Please note that your user details will be saved by default.
Tap on the Login button to proceed.
VPN App Connection Status Page
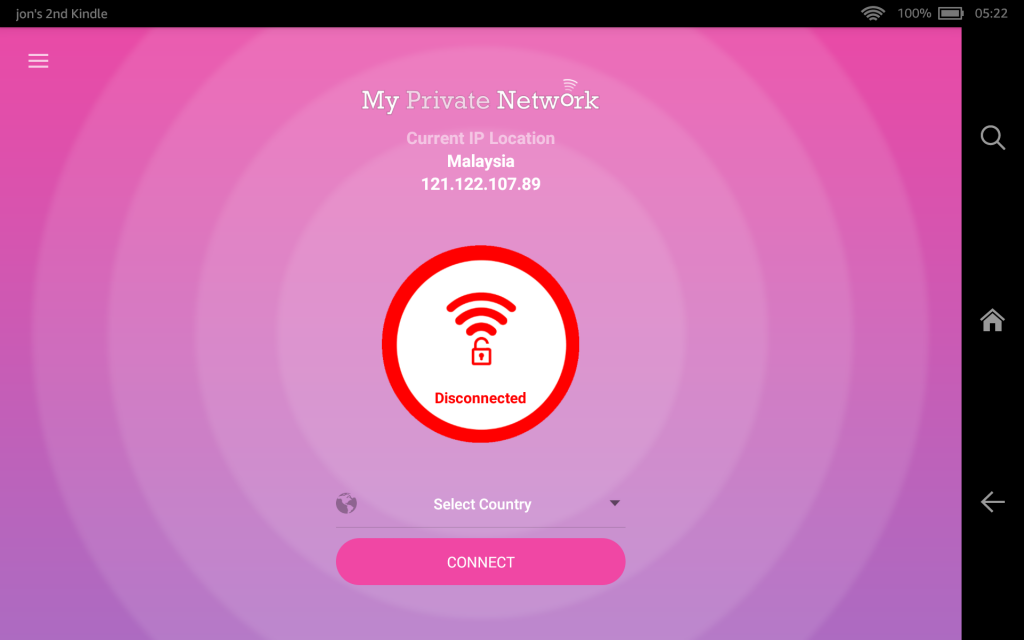
This is the main application screen which will show these details :
STATUS CIRCLE: This field will either be Disconnected, Connecting or Connected depending on the current status of your VPN connection. Please note that the colour of this icon will change accordingly, as well.
CURRENT IP LOCATION: This is your current effective Country and IP address that the rest of the internet sees for your device.
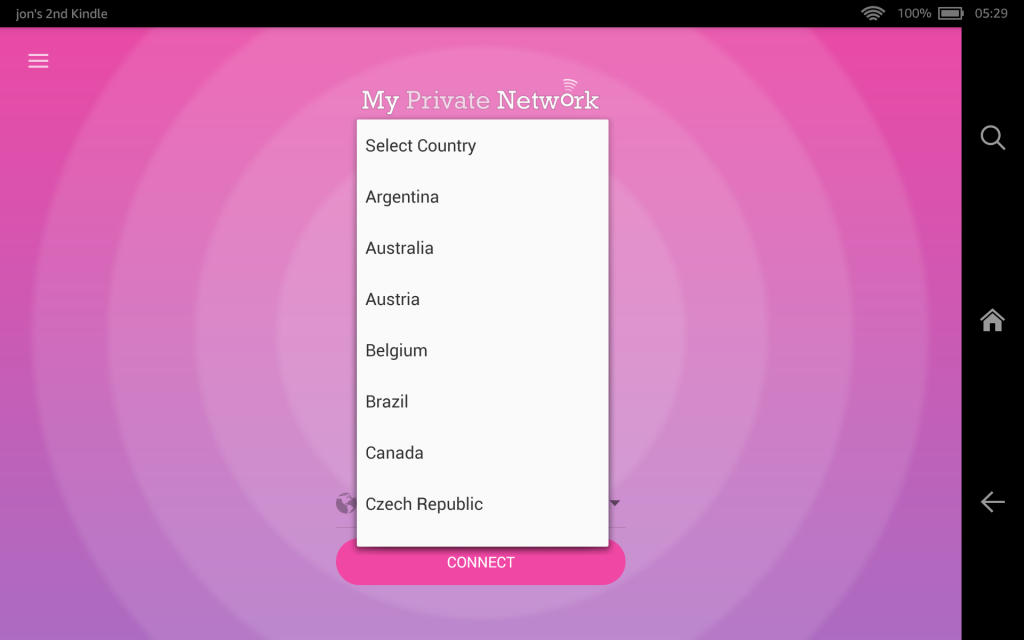
SELECT COUNTRY: Select the country that you wish to connect to. If you have a Global subscription, you can choose which country you wish to connect to by tapping on the drop down menu and scrolling through the list of countries.
If you only have a single country subscription, you will only see the country you are subscribed to and our Free Servers.
For 3-Days Free Trial: If you’re on our Free Trial, you can select from 44 available countries.
For Free Plan: You will also not be able to change this field (Free Servers) and your connection will be rotated between different countries we have in our Free VPN cluster.
Connecting to the VPN
To connect to our VPN service, make sure you have set the country and protocol as required and then tap on Connect.
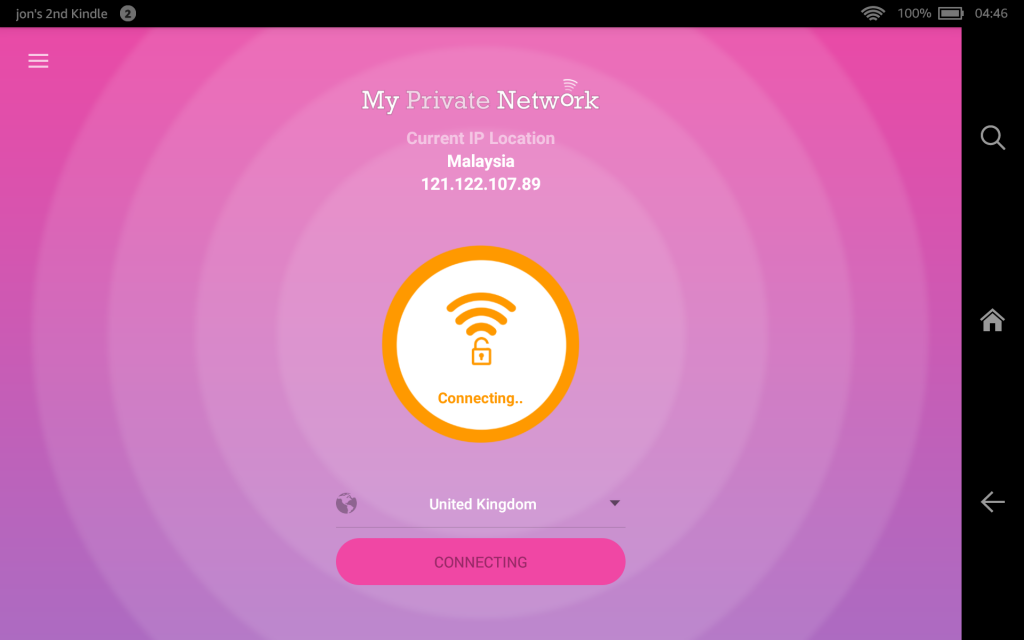
The App status circle will turn orange in addition to the Status which will state Connecting. You may notice a few messages in the status bar if you expand it.
After a few moments the VPN should connect and the app status will turn green with the Status Connected to confirm connection.
You should also notice that the action button in the application has changed from Connect to Disconnect.
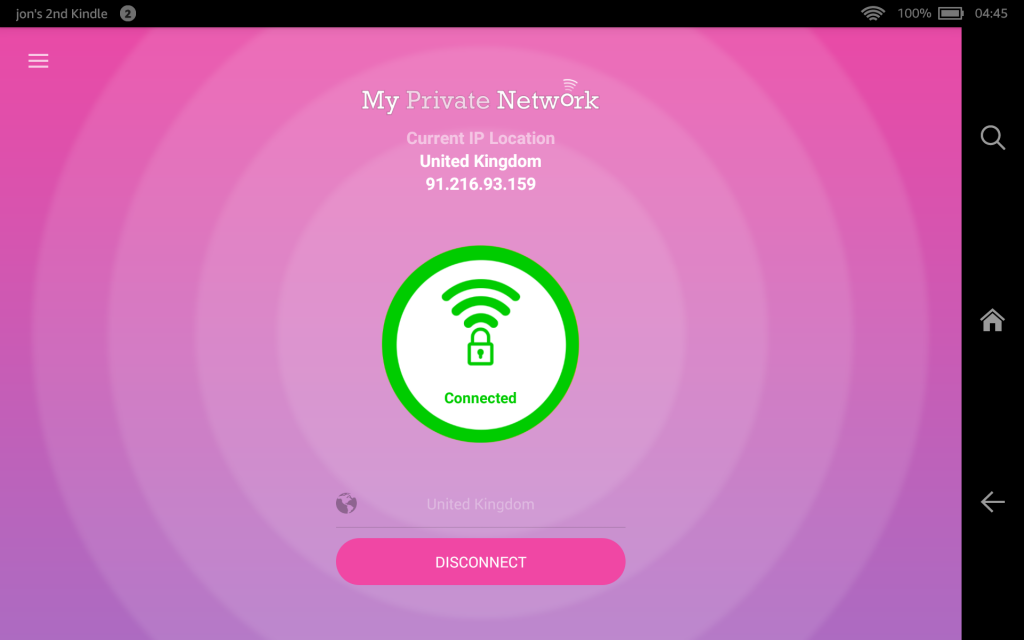
The connection details will also update, and should now reflect the country that you were connecting to.
In the above examples, we were physically in Malaysia but after connecting to the VPN, the location has changed to United Kingdom.
Once you are happy that the VPN has connected, simply tap the home button to minimize the app and you can then open the app of your choice and surf the internet as if you were in your chosen country.
Disconnecting from the VPN
To disconnect the VPN, simply launch the app and tap Disconnect.
Alternatively, you can swipe down on the status bar, tap the VPN status icon, and it should open a prompt which you can then tap on Disconnect.

The app status circle icon will switch back to red if the VPN is disconnected.
App Guide and Information Status
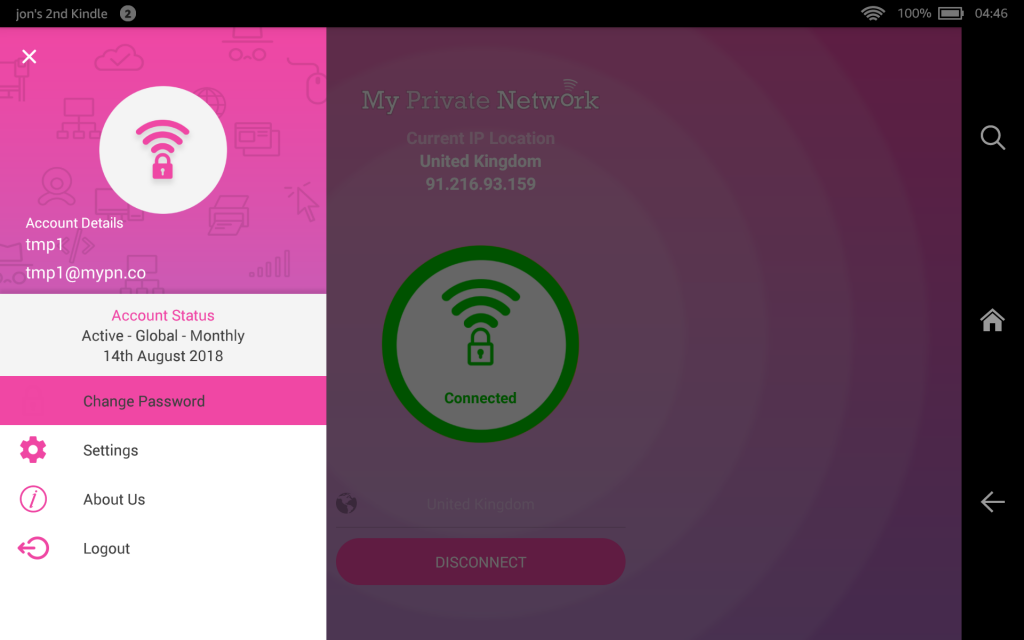
Tap on the menu button on the top left hand side of the screen to view your Account Details. This screen will also contain additional information such as your VPN username and your account status.
If you wish to logout from the app, simply click on Logout. You’ll need to enter your login details again to use the app the next time.
Please note that by default you will be connecting to our servers via the UDP protocol on port 1194.
You can also select UDP 4096 for the highest possible encryption available for our servers and the TCP connections, which just provide some different options in the event that you are having difficulty connecting via the default UDP protocol.
To change this, tap on Settings.
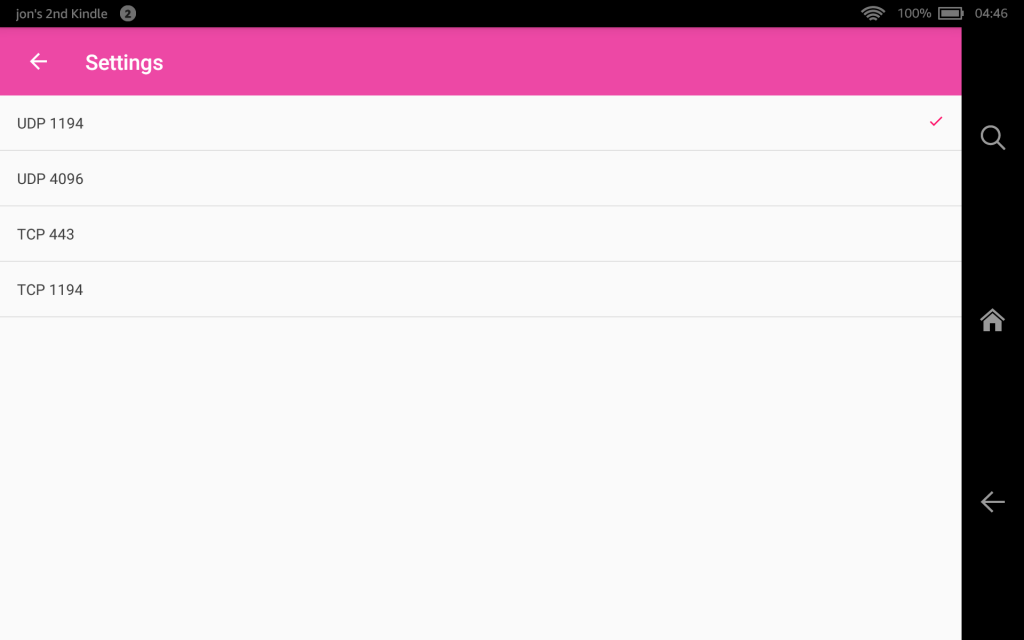
Select the protocol that you wish to connect with and head back to the main screen to Connect.
For more details on the differences of the available protocols, please refer to our Knowledge Base article below:
Any Problems?
We usually find the SSL OpenVPN protocol to be very resilient, however, it can be blocked on certain network and/or mobile data connections. If you’re having problems, try and test the VPN with the alternate protocols given and on a different network and if it still fails, please message us by clicking on the Contact Us option from the Menu and let us know the issue.
In the meantime, please try connecting to our service via the L2TP or PPTP VPN protocol. We have prepared some instructions which will guide you through the setup on your Kindle Fire using these protocols, they can be found on the following links:
Kindle Fire L2TP VPN Setup
Kindle Fire PPTP VPN Setup
Alternatively, email us directly at This e-mail address is being protected from spambots. You need JavaScript enabled to view it and we will do our best to assist you.