Setting up your Linux (Terminal) computer to use My Private Network’s MyTelly service should take just a few minutes by following the steps below. These instructions are using the default Terminal interface which is available on almost all Linux distributions. Please note that your Linux computer needs to be connected to the Internet and able to browse the web before moving on with the instructions below. You do not need to be connected to our VPN for MyTelly to work, kindly disconnect from the VPN if you have it turned on.
Prefer to setup MyTelly using Terminal? Follow the guide in the link below:
Linux Smart DNS MyTelly Setup (Ubuntu)
Not yet registered? It’s quick and easy, Sign Up now!
Check MyTelly DNS Settings
Login to our website, www.my-private-network.co.uk from your computer browser and you should be redirected to the My Subscription page.
Select the MyTelly tab on the left hand corner of the screen and click on Setup.
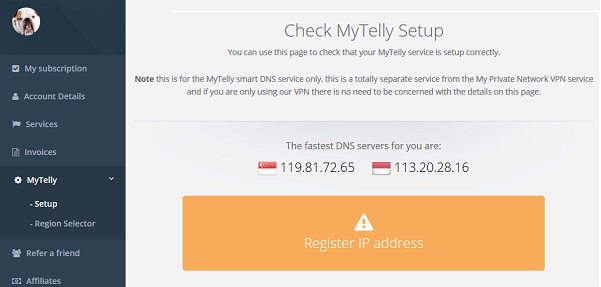
Take note of the DNS server addresses that appears on your screen, you’ll need it during the setup later.
Setup MyTelly on your Linux (Terminal)
Go to your Terminal and type in sudo bash. This will give you super user privilege.
Once you have the super user (administrator) access, type in the command below to back up your network configuration file.
cp /etc/resolv.conf /etc/resolv.orig

Next, type in the command below to remove the resolv.conf file.
rm /etc/resolv.conf

Now, type in the command below one at a time.
Note: You will need to replace xxx.xxx.xxx.xxx with the DNS server addresses that appeared in Step 1. In this example, our fastest DNS server addresses are 119.81.72.65 and 113.20.28.16.
echo "nameserver xxx.xxx.xxx.xxx" > /etc/resolv.conf
echo "nameserver xxx.xxx.xxx.xxx" >> /etc/resolv.conf

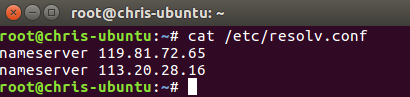
Finally, type in the command below to check if you’ve configured the DNS correctly.
cat /etc/resolv.conf
If the set up was successful, it will display the DNS addresses that you’ve specified earlier:
Once you’re done, head back to the MyTelly Settings page.
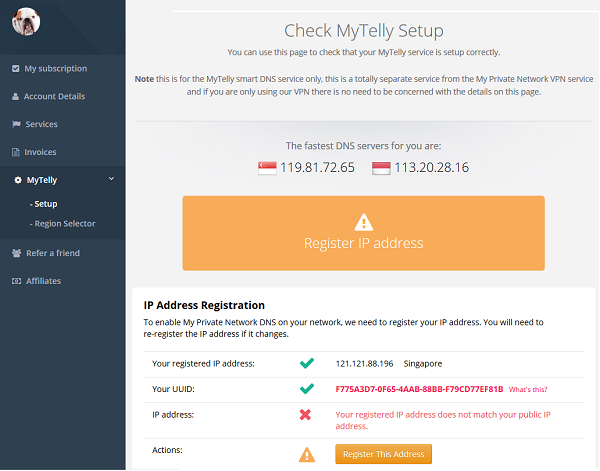
Register IP Address for MyTelly
Scroll down and click on Register This Address. This will register your IP address and also test your DNS setup to indicate whether you have configured the DNS settings correctly.
You will get a Your DNS is configured correctly! Enjoy! message on your screen if your DNS has been set successfully on your system.
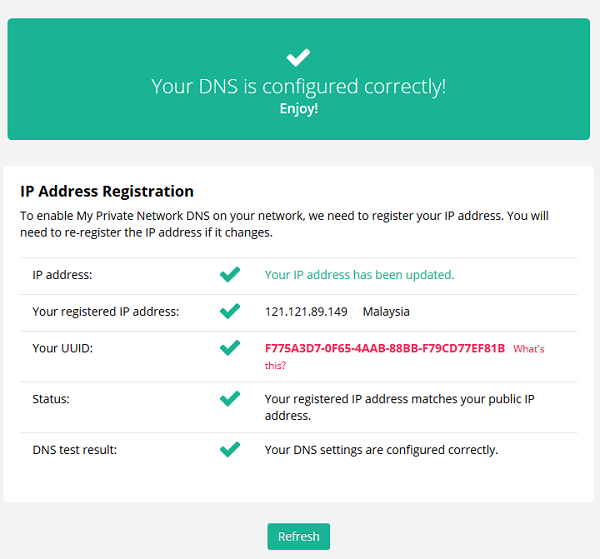
Note: You will not have to do it again unless your IP address changes. Also, any device on the same network will be able to use the MyTelly service as long as you’ve set our DNS on their device’s settings.
Now that you have setup and registered your system, you can go ahead and access any TV content providers that we support!
Any Problems?
Unfortunately it doesn’t always go to plan!
If you have any problems or can’t get MyTelly to work, please email us at [email protected]. We’ll get back to you as soon as possible and try to help.