Kodi – The four letter word that evolved to be the world’s most notorious Media Centre, ever. Over the years, Kodi has become a well known utility in the digital industry as the all-in-one solution to bring all of your media content together in one place.
As home media centres become increasingly easier to use, Kodi is reaching greater numbers of mainstream users. Having said that, Kodi’s notoriety didn’t come overnight – it’s a double edge sword of owning an open source platform that literally hosts millions of media content from music, movies, TV shows, live sports, to many others. We’ll give you a thorough explanation on what Kodi is all about, whether it’s illegal in the eyes of the law, and how you could be using it as an all-in-one hub for all of your media content.
What Is Kodi?
The short answer: Kodi is simply a free, open source media centre software that can be used to centralise your media content on virtually any device such as an Android phone, home PC, and everything else in between.
The long answer: Originally launched in 2002 as XBMP (Xbox Media Player), it eventually evolved to the better known XBMC (Xbox Media Centre) not long after in 2004. It slowly took another 10 years, but by 2014 – XBMC rebranded to the media centre we all know and love, Kodi. The name change helped establish it as a multifaceted media centre in its own right, no longer carrying a name associated with Microsoft’s old console. Ever since then, it has grown exponentially to become one of the most popular media centre’s anywhere.
As a multifaceted media centre, Kodi is a highly customisable software with a large variety of skins to change its appearance, and plug-ins that allow users to access media content streams via online services such as Amazon Prime Instant Video, Crackle, BBC iPlayer, Pandora, Spotify, Youtube and countless more. The open source nature of Kodi allows a healthy environment for third party developers to modify and create useful and integrated tools for Kodi.
However, at the same time because of its open source nature – some third party developers have long been creating plug-ins to facilitate in unauthorised access to copyrighted media content. Due to this, Kodi has attracted negative attention from the availability of these plug-ins on its platform. As the official developer’s of Kodi, the XBMC Foundation has not endorsed any of these uses and has taken steps to disassociate the Kodi project from these illegal products which included threatening legal action against those using the Kodi brand to promote them.
What Can I Do With Kodi?
The basic features of Kodi essentially allows you to organise your own music, photos, movies, and TV shows stored on one device which can then be played on another device. With additional plug-ins, you could also use it to stream and record live TV, access electronic programme guides, stream radio stations, view weather forecasts, install softwares such as IRC Chat or email clients, and even use a smartphone app to act as a remote control for Kodi.
Kodi is incredibly versatile when it comes to handling media files, supporting a long list of formats which makes it the perfect home media centre. The official list of supported file types can be found at the Kodi Wiki, but we’ve included a summary below for easier reading:
● For Videos: Kodi can add posters, fan art, trailers, video extras, and more to each of your video items. Supports popular formats such as H.264, ISO, WMV, and many others.
● For Music: Kodi allows users to tag different tracks and compile songs into a smart playlist. Supports popular formats such as MP3, AAC, AIFF, and many others.
● For TV Shows: Kodi can add posters, tags and even provide show descriptions and actors.
● For Pictures: Showcase your pictures in slideshow with many available affects such as panning/zooming and “Ken Burns”. Supports popular formats such as JPEG, GIF, PNG, and many others.
● For streaming and recording Live TV: Install a suitable Kodi plug-in such as MediaPortal, MythTV, TVheadend, and NextPVR that has this feature.
Kodi’s interface is specifically designed with Home Theatre in mind. This means that Kodi is usually best viewed on a large-screen TV while sitting comfortably on your couch 10-feet away, rather than on a tiny display while you sit on your home desk. Therefore, the best way to interact with Kodi is via a remote control, rather than a computer mouse. The way you should think of Kodi is that it’s your ultimate DVD-player/set-top-box.
Why Use a VPN or Smart DNS With Kodi?
The reasons people use Kodi coupled by either a VPN or Smart DNS is mainly to bypass specific geo-restricted content from Kodi add-ons. So if you’re thinking of streaming content from providers outside your locality, you’ll definitely want to have a VPN installed. For example, say you were in the US and wanted to use BBC iPlayer on your Kodi, you’ll need a VPN connection to the U.K before the add-on decides to grant you access. Plus, using a VPN provides an extra layer of security!
Besides using a VPN, you could also have our Smart DNS instead which gives you the same functionality to bypass specific geo-restricted content. However, it works slightly different than a VPN in that it doesn’t provide that extra layer of security. Nevertheless, a Smart DNS has the advantage of being able to route specific geo-restricted content from multiple countries all at the same time. So say you wanted to watch content from BBC iPlayer (U.K) and USTVNow (U.S) – usually you’ll have to connect to a U.K VPN for BBC iPlayer and switch over to a U.S VPN connection to watch USTVNow. However with our Smart DNS, you could access both at the same time without the hassle of switching VPN connections.
Learn why MyTelly (Smart DNS) is different than a VPN here
Don’t Have a VPN yet? give our Free Trial a go by clicking the button below for 3 full days of unlimited access to both our VPN and MyTelly services.
How Can I Install Kodi On My Device?
Kodi is supported by a wide range of devices such as your usual desktop computer, smart tablets and phones, tiny set-top-boxes, and much more. Kodi has detailed step-by-step Wiki instructions for the devices it supports to get you up to speed.
For the purpose of this guide, we’ll be providing additional instructions on how to setup Kodi on your device with our services. Kindly follow any of the guides below for your relevant device:
Windows
1. Install VPN or MyTelly:
Setup VPN On Your Windows Computer
OR
Setup MyTelly (Smart DNS) On Your Windows Computer
2. Install Kodi:
Setup Kodi on Your Windows Computer
Latest Kodi Build: Kodi v17.6 “Krypton” (recommended)
Windows Version: Windows 7 and above
RAM: 1GB (minimum)
Drive Space: 4GB (minimum)
Get Started
1. Download the Kodi installer for Windows from the official Kodi download page.
2. Once it’s downloaded, double-click on the Kodi file to launch the Kodi installer.
Installing Kodi
1. Once the Kodi installer is launched, click Next to continue.
2. You should now receive a prompt on your computer to start the Kodi installation. Follow the steps on the prompt to continue.
3. Once it’s done, click on Finish to complete the installation.
4. Congrats! You’ve successfully installed Kodi on your Windows computer. Launch the Kodi app to begin using it.
Start installing Kodi add-ons that you need here
Mac
1. Install VPN or MyTelly:
Setup VPN On Your Mac Computer
OR
Setup MyTelly (Smart DNS) On Your Mac Computer
2. Install Kodi:
Setup Kodi on Your Mac Computer
Latest Kodi Build: Kodi v17.6 “Krypton” (recommended)
Mac Version: OS X 10.8 and above
Get Started
1. Download the Kodi installer for Mac from the official Kodi download page.
2. Once it’s downloaded, double-click on the Kodi disk image to extract the Kodi application.
Installing Kodi
1. Once the Disk Image is extracted, you’ll be prompted to drag and drop the app into the application folder.
2. Congrats! You’ve successfully installed Kodi on your Mac computer. Launch the Kodi app.
Note: You might receive a notification on your Mac that disallows opening applications from unknown developers. If you’re encountering this issue, kindly follow these steps:
1. Launch System Preferences on your Mac and click on Security & Privacy.
2. Click the “Lock” at the bottom left of the window to make changes. (You’ll need to enter your Mac password to unlock)
3. Under the General tab, select “Anywhere” from the “Allow apps downloaded from” option.
Start installing Kodi add-ons that you need here
Linux
1. Install VPN or MyTelly:
Setup VPN On Your Linux Computer
OR
Setup MyTelly (Smart DNS) On Your Linux Computer
2. Install Kodi:
Setup Kodi on Your Linux Computer
Latest Kodi Build: Kodi v17.6 “Krypton” (recommended)
RAM: 1GB (minimum)
Disk Space: 4GB (minimum)
Important: Later versions of Ubuntu include Kodi built by Ubuntu themselves. If you have installed Ubuntu Kodi, please remove the packages “kodi kodi-bin kodi-data” before trying to install it with the steps below. Official steps can be found from the official Kodi Wiki for Linux installation.
1. Launch Terminal.
2. In the Terminal box, enter the following commands and follow the prompts as you would any other software installation:
sudo apt-get install software-properties-common

sudo add-apt-repository ppa:team-xbmc/ppa

sudo apt-get update

sudo apt-get install kodi
3. Congrats! You’ve successfully installed Kodi on your Linux computer.
Start installing Kodi add-ons that you need here
Raspberry Pi
For the purpose of this guide, we’ll be detailing how to install Kodi LibreElec using NOOBS (New Out of Box Software) on your Raspberry Pi to make the process much simpler to setup. Kodi is preloaded by default on the LibreElec OS so installation can be much quicker.
1. Install Kodi LibreElec OS:
Install Kodi LibreElec OS on Your Raspberry Pi
Get Started
To manually install NOOBS, you’ll need a few things:
● A computer with an SD card slot.
● An SD or microSD card with at least 8GB of space.
Download NOOBS
You’ll first need to load NOOBS on an SD card:
1. Firstly, Download NOOBS from the official NOOBS download page.
Note: There are two versions of NOOBS, “NOOBS” and “NOOBS Lite”. With NOOBS Lite, you’ll need to be connected to a network to install any of the OSes NOOBS have available. Whereas NOOBS already has the installer files within and do not need a network connection to begin any installation. Download whichever version that suits you better.
2. The NOOBS file will be downloaded as a .zip file. So you’ll need to extract it first before the next step.
Format Your SD Card
Once the NOOBS .zip file is extracted, it’s now time to load NOOBS into your SD card. You’ll need to format your SD card as FAT:
1. Insert your SD card into the SD slot of your computer.
On Windows, you may use the free Formatting Tool by SD Association to do so. Just ensure that the “Format Size Adjustment” option is set to “On” before formatting to FAT. Mac users simply need to use the Disk Utility tool which comes default on every Mac.
2. Once your SD card is formatted to FAT, you’re now ready to install NOOBS on it.
Install NOOBS On Your SD Card
With the extracted NOOBS files, you’ll need to put them in your newly formatted SD card:
1. With the extracted files (the files that are inside the .zip NOOBS file), select all to drag and drop them into your SD card.
2. You should now have all the NOOBS files necessary to begin installation on your Raspberry Pi.
Install LibreElec On Your Raspberry Pi
With the newly created NOOBS SD card, you can now easily install LibreElec on your Raspberry Pi:
1. Insert your NOOBS SD card into your Raspberry Pi and boot it up.
2. You should now see a window with a list of different OSes that you can install. Select LibreElec_RPi2 to install the Kodi based OS.
3. Click Install to begin the process.
4. After the installation in complete, the Raspberry Pi configuration menu will appear. Configure the settings as you would any other computer and click on Finish once you’re happy.
5. Congrats! You now have Kodi LibreElec on your Raspberry Pi. Your device should now automatically boot into Kodi whenever you start up your Raspberry Pi.
6. Continue to install our VPN or MyTelly service on your Raspberry Pi in the next steps.
Start installing Kodi add-ons that you need here
2. Install VPN or MyTelly:
Setup VPN On Your Raspberry Pi (Kodi LibreElec OS)
OR
Setup MyTelly (Smart DNS) On Your Raspberry Pi (Kodi LibreElec OS)
Add-Ons: What Is Recommended?
Disclaimer: This guide is for educational purposes only. My Private Network does not support piracy and bears no responsibility for what you decide to do with the information provided in this article. In addition to that, My Private Network does not host, develop, or produce any of the Kodi software mentioned within this article.
Now that you’ve successfully installed Kodi on your device, it’s a good time to decide what kinds of services you’d like to install on it! We’ve summarised our best “legal” selections for streaming movies, TV shows, sports events, and music below:
Videos: General

iPlayer www (BBC player)
The unofficial BBC iPlayer app for free live and catchup TV from the UK. You’ll need a VPN connection to the U.K in order to access their content. Whilst you do not need a BBC account to start streaming, signing in to your account allows Kodi to fetch all your personal configurations like favourites or recommendations. Don’t have an account with BBC iPlayer? Learn how to sign up here.
Install BBC iPlayer on Kodi 17 Krypton
1. Launch Kodi and click on Add-ons.
2. Click on the Add-on Browser (box icon on the top-left corner).
3. Select Install from Repository.
4. Select the Kodi Add-On Repository and click on Video Addons.
5. Select WWW iPlayer from the list and click on Install to proceed.
6. In a few minutes, the Add-on Enabled notification should appear to indicate that the add-on has been successfully installed.
7. Go back to your Kodi home screen and you should find the BBC iPlayer app by clicking on Addons –> Video Addons –> WWW iPlayer.
8. Congrats! You’ve successfully installed BBC iPlayer for Kodi. Launch the WWW iPlayer add-on to begin using it.
Note: To enter your BBC iPlayer email and password, right-click or long-press on the iPlayer www app and select Settings.

iTV
The free iTV app for live and catchup TV from the UK. Update: Unfortunately, it doesn’t seem that the iTV app is working on Kodi any more with a VPN or Smart DNS. We highly recommend that you check out Zattoo instead.
Install iTV on Kodi 17 Krypton
1. Launch Kodi and click on Settings (gear icon on the top-left corner).
2. Navigate to File Manager –> Add Source.
3. Select None and type in the following URL exactly as below:
http://nan.aftermathwizard.net/nanrepo
4. Click OK to continue.
5. In the same menu, highlight the box underneath marked as “enter a name for this media source”. Name it nanrepo (you can call it whatever you like) and click on OK to confirm the new source.
6. Go back to your Kodi home screen and navigate to Add-ons –> Add-on Browser (box icon on the top-left corner).
7. Select Install from Zip file and choose the source you just added (nanrepo).
8. Click noobsandnerds Repo (x.x).zip and click OK to continue.
9. In a few minutes, the Add-on Enabled notification should appear to indicate that the new repository has been successfully added.
10. From the same Add-on Browser, click Install from repository.
11. Navigate to noobsandnerds Repository –> Video Addons –> iTV.
12. Click on Install to proceed.
13. In a few minutes, the Add-on Enabled notification should appear to indicate that the add-on has been successfully installed.
14. Go back to your Kodi home screen and you should find the iTV app by clicking on Addons –> Video Addons –> iTV.
15. Congrats! You’ve successfully installed iTV for Kodi. Launch the iTV add-on to begin using it.

UKTV Play
The unofficial UKTV Play app for live and catchup TV from the UK is an ad-free supported streaming service.You’ll need a VPN connection to the U.K in order to access their content.
Install UKTV Play on Kodi 17 Krypton
1. Launch Kodi and click on Settings (gear icon on the top-left corner).
2. Navigate to File Manager –> Add Source.
3. Select None and type in the following URL exactly as below:
http://nan.aftermathwizard.net/nanrepo
4. Click OK to continue.
5. In the same menu, highlight the box underneath marked as “enter a name for this media source”. Name it nanrepo (you can call it whatever you like) and click on OK to confirm the new source.
6. Go back to your Kodi home screen and navigate to Add-ons –> Add-on Browser (box icon on the top-left corner).
7. Select Install from Zip file and choose the source you just added (nanrepo).
8. Click noobsandnerds Repo (x.x).zip and click OK to continue.
9. In a few minutes, the Add-on Enabled notification should appear to indicate that the new repository has been successfully added.
10. From the same Add-on Browser, click Install from repository.
11. Navigate to noobsandnerds Repository –> Video Addons –> UKTV Play.
12. Click on Install to proceed.
13. In a few minutes, the Add-on Enabled notification should appear to indicate that the add-on has been successfully installed.
14. Go back to your Kodi home screen and you should find the UKTV Play app by clicking on Addons –> Video Addons –> UKTV Play.
15. Congrats! You’ve successfully installed UKTV Play for Kodi. Launch the UKTV Play add-on to begin using it.

Zattoo Box
Zattoo Box is the official Zattoo app for Kodi which offers free live TV available in the Switzerland, UK, Denmark, Germany, Spain, France, and Sweden. Whilst Zattoo is available for free, you’ll need to create a free Zattoo account in order to access it. Zattoo offers over 190 channels for free users on it’s ad-supported platform, but you could always upgrade to a paid subscription to avoid seeing ads. Don’t have a Zattoo account yet? Sign Up here. Update: We highly recommend using Zattoo if you’re interested in UK channels from BBC iPlayer and iTV. We’ve tested them to be working fine on Zattoo with our services. Connect to our Switzerland (CHE) VPN to access Zattoo’s larger content library.
Install Zattoo Box on Kodi 17 Krypton
1. Launch Kodi and click on Add-ons.
2. Click on the Add-on Browser (box icon on the top-left corner).
3. Select Install from Repository and click on Kodi Add-On Repository
4. Select Zattoo Box from the list and click on Install to proceed.
5. In a few minutes, the Add-on Enabled notification should appear to indicate that the add-on has been successfully installed.
6. Go back to your Kodi home screen and you should find the Zattoo app by clicking on Addons –> Video Addons –> Zattoo Box.
8. Congrats! You’ve successfully installed Zattoo for Kodi. Launch the Zattoo Box add-on to begin using it.
Note: To enter your Zattoo email and password, right-click or long-press on the Zattoo Box app and select Settings.

USTVNow Plus
The unofficial USTVNow app for live and catchup TV from the US. You’ll need a VPN connection to the U.S in order to access their content. Free users can access 6 channels (ABC, CBS, CW, FOX, PBS, and My9) but you can upgrade to their paid plans for up to 24 channels. Don’t have an account with USTVNow? Sign Up here.
Install USTVNow on Kodi 17 Krypton
1. Launch Kodi and click on Settings (gear icon on the top-left corner).
2. Navigate to File Manager –> Add Source.
3. Select None and type in the following URL exactly as below:
http://fusion.tvaddons.co
4. Click OK to continue.
5. In the same menu, highlight the box underneath marked as “enter a name for this media source”. Name it fusion (you can call it whatever you like) and click on OK to confirm the new source.
6. Go back to your Kodi home screen and navigate to Add-ons –> Add-on Browser (box icon on the top-left corner).
7. Select Install from Zip file and choose the source you just added (fusion).
8. Navigate to kodi-repos –> english –> repository.xbmchub-x.x.x.zip and click OK to continue.
9. In a few minutes, the Add-on Enabled notification should appear to indicate that the new repository has been successfully added.
10. From the same Add-on Browser, click Install from repository.
11. Navigate to TVADDONS.CO Add-on Repository –> Video Addons –> USTVnow Plus.
12. Click on Install to proceed.
13. In a few minutes, the Add-on Enabled notification should appear to indicate that the add-on has been successfully installed.
14. Go back to your Kodi home screen and you should find the USTVNow Plus app by clicking on Addons –> Video Addons –> USTVnow Plus.
15. Congrats! You’ve successfully installed USTVNow for Kodi. Launch the USTVNow add-on to begin using it.
Note: You’ll be asked to enter your login details upon launch. If you’d like to enter your USTVNow email and password manually, right-click or long-press on the USTVNow app and select Settings.

PopcornFlix
PopcornFlix offers a broad collection of movies from the U.S for free. There is an international version, but the collection is much less. You’ll need a VPN connection to the U.S to get full access to their larger content library.
Install PopcornFlix on Kodi 17 Krypton
1. Launch Kodi and click on Add-ons.
2. Click on the Add-on Browser (box icon on the top-left corner).
3. Select Install from Repository.
4. Select the Kodi Add-On Repository and click on Video Addons.
5. Select Popcornflix from the list and click on Install to proceed.
6. In a few minutes, the Add-on Enabled notification should appear to indicate that the add-on has been successfully installed.
7. Go back to your Kodi home screen and you should find the PopcornFlix app by clicking on Addons –> Video Addons –> Popcornflix.
8. Congrats! You’ve successfully installed PopcornFlix for Kodi. Launch the PopcornFlix add-on to begin using it.

Crunchyroll
Crunchyroll is a paid service that offers on demand streaming for Anime content from the U.S. The international version has less content but is accessible anywhere around the world. You’ll need a VPN connection to the U.S first to access their larger content library. Don’t have an account with Crunchyroll? Sign Up here.
Install Crunchyroll on Kodi 17 Krypton
1. Launch Kodi and click on Add-ons.
2. Click on the Add-on Browser (box icon on the top-left corner).
3. Select Install from Repository.
4. Select the Kodi Add-On Repository and click on Video Addons.
5. Select Crunchyroll from the list and click on Install to proceed.
6. In a few minutes, the Add-on Enabled notification should appear to indicate that the add-on has been successfully installed.
7. Go back to your Kodi home screen and you should find the Crunchyroll app by clicking on Addons –> Video Addons –> Crunchyroll .
8. Congrats! You’ve successfully installed Crunchyroll for Kodi. Launch the Crunchyroll add-on to begin using it.
Note: To enter your Crunchyroll email and password, right-click or long-press on the Crunchyroll app and select Settings.

Youtube
Youtube as we know it, is the most popular streaming platform in the world.
Install YouTube on Kodi 17 Krypton
1. Launch Kodi and click on Add-ons.
2. Click on the Add-on Browser (box icon on the top-left corner).
3. Select Install from Repository.
4. Select the Kodi Add-On Repository and click on Video Addons.
5. Select Crunchyroll from the list and click on Install to proceed.
6. In a few minutes, the Add-on Enabled notification should appear to indicate that the add-on has been successfully installed.
7. Go back to your Kodi home screen and you should find the YouTube app by clicking on Addons –> Video Addons –> YouTube .
8. Congrats! You’ve successfully installed YouTube for Kodi. Launch the YouTube add-on to begin using it.
Videos: Sports

NFL Game Pass
NFL Game Pass is the go to app for everything football on Kodi. The paid service offers the International NFL Game Pass version for non-US subscribers which avoids blackouts. Due to blackout restrictions, it’s better to connect to a VPN country outside of the US in order to watch full live games. Don’t have an NFL Game Pass subscription yet? Learn how “hack” NFL Game Pass for cheaper subscriptions and avoid blackouts.
Install NFL Game Pass on Kodi 17 Krypton
1. Launch Kodi and click on Add-ons.
2. Click on the Add-on Browser (box icon on the top-left corner).
3. Select Install from Repository and click on Kodi Add-On Repository
4. Select NFL Game Pass from the list and click on Install to proceed.
5. In a few minutes, the Add-on Enabled notification should appear to indicate that the add-on has been successfully installed.
6. Go back to your Kodi home screen and you should find the NFL Game Pass app by clicking on Addons –> Video Addons –> NFL Game Pass.
8. Congrats! You’ve successfully installed NFL Game Pass for Kodi. Launch the NFL Game Pass add-on to begin using it.
Note: You will be required to enter your NFL Game Pass login details when you first launch the add-on. To enter your NFL Game Pass email and password manually, right-click or long-press on the NFL Game Pass app and select Settings.

ESPN
ESPN offers live stream of multiple major sports such as college football, NBA, NCAA Basketball, NHL, and MLB. ESPN requires an American cable provider subscription in order to access their content. You’ll also need our VPN connection to the U.S to use ESPN.
Install ESPN on Kodi 17 Krypton
1. Launch Kodi and click on
Add-ons.
2. Click on the
Add-on Browser (box icon on the top-left corner).
3. Select
Install from Repository and click on
Kodi Add-On Repository
4. Select
ESPN 3 or
ESPN Player from the list and click on
Install to proceed.
5. In a few minutes, the
Add-on Enabled notification should appear to indicate that the add-on has been successfully installed.
6. Go back to your Kodi home screen and you should find the ESPN app by clicking on
Addons –>
Video Addons –>
ESPN 3.
8.
Congrats! You’ve successfully installed ESPN for Kodi. Launch the ESPN 3 add-on to begin using it.
Note: You will be required to enter your cable provider login details when you first launch the add-on. Simply activate your Kodi device at
http://es.pn/appletv with the activation code shown on Kodi (Using the Apple TV link will work for Kodi).

NBC Sports
NBC Sports coverage includes NBA, NHL, MLB, Formula 1, football and the Olympics. NBC Sports requires an American cable provider subscription in order to access their content. You’ll also need our VPN connection to the U.S to use NBC Sports.
Install NBC Sports on Kodi 17 Krypton
1. Launch Kodi and click on
Add-ons.
2. Click on the
Add-on Browser (box icon on the top-left corner).
3. Select
Install from Repository and click on
Kodi Add-On Repository
4. Select
NBC Sports Live Extra from the list and click on
Install to proceed.
5. In a few minutes, the
Add-on Enabled notification should appear to indicate that the add-on has been successfully installed.
6. Go back to your Kodi home screen and you should find the NBC Sports app by clicking on
Addons –>
Video Addons –>
NBC Sports Live Extra.
8.
Congrats! You’ve successfully installed NBC Sports for Kodi. Launch the NBC Sports Live Extra add-on to begin using it.
Note: You will be required to enter your cable provider login details when you first launch the add-on. Simply activate your Kodi device at
http://activate.nbcsports.com with the activation code shown on Kodi.

UFC Fight Pass
UFC Fight Pass is the go to app for everything UFC. A paid UFC subscription is required in order to access their content. You’ll also need our VPN connection to the U.S to use UFC Fight Pass. Don’t have a UFC subscription yet? Sign Up here.
(Update: Unfortunately, the Portse Repo has been remove. These steps no longer work for UFC. We’ll update this again once we have an alternative link.)
Install UFC Fight Pass on Kodi 17 Krypton
1. Firstly, you’ll need to download the Portse repo (link removed) to your device in a folder you can easily find later.
2. Then, launch Kodi and click on Add-ons.
2. Click on the Add-on Browser (box icon on the top-left corner).
3. Choose Install from Zip File and locate the Portse repo file you had just downloaded to install.
5. In a few minutes, the Add-on Enabled notification should appear to indicate that the add-on has been successfully installed.
6. From the same Add-On Browser menu, select Install from Repository –> Portse repo –> Video Addons.
7. Click UFC Fight Pass to install.
5. In a few minutes, the Add-on Enabled notification should appear to indicate that the add-on has been successfully installed.
6. Go back to your Kodi home screen and you should find the UFC Fight Pass app by clicking on Addons –> Video Addons –> UFC Fight Pass.
8. Congrats! You’ve successfully installed UFC Fight Pass for Kodi. Launch the UFC Fight Pass add-on to begin using it.
Note: You will be required to enter your UFC Fight Pass login details when you first launch the add-on.

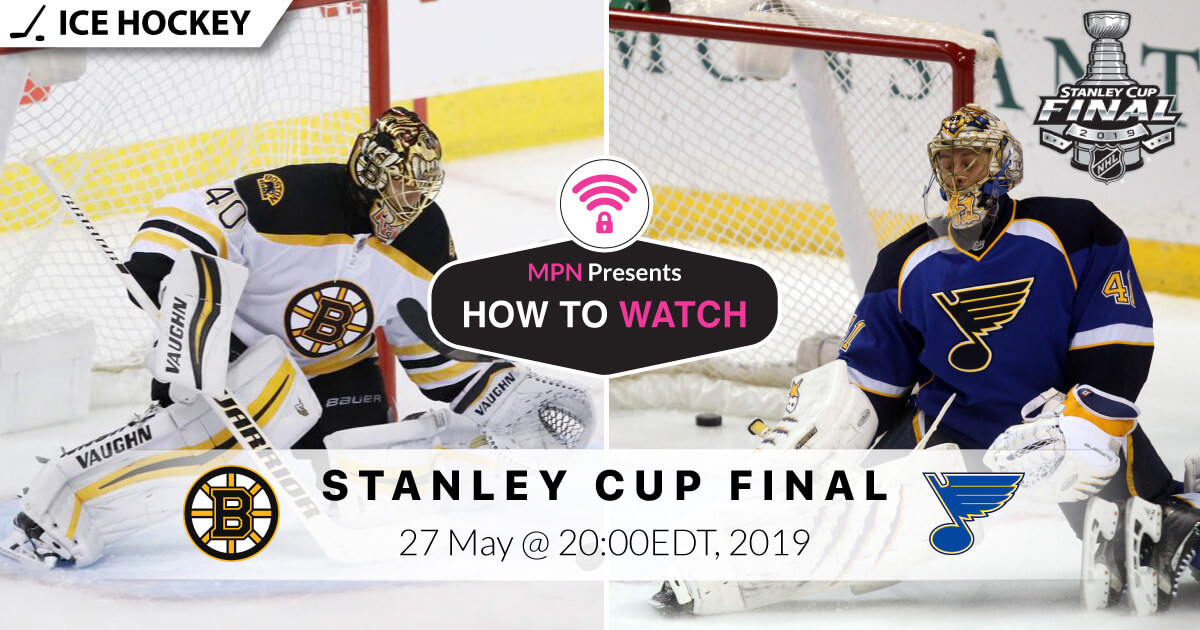
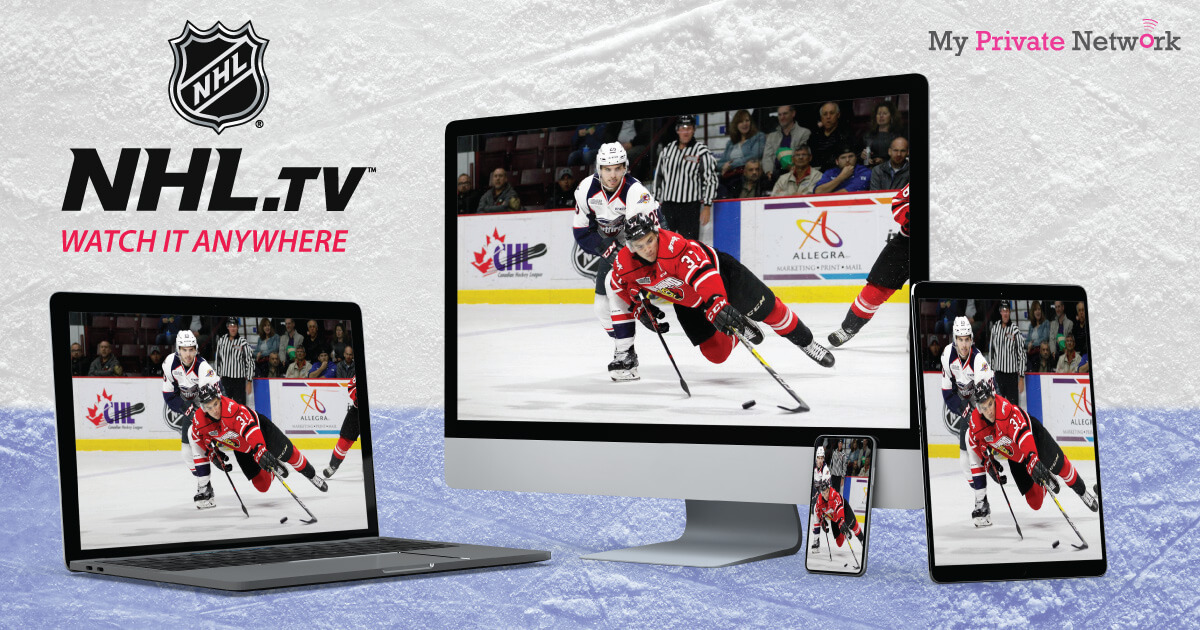
NHL.tv
NHL.TV is the go to app for everything hockey. Due to blackout restrictions, it’s better to connect to a VPN country outside of the US in order to watch full live games. Don’t have an NHL.TV subscription yet? Sign Up here.
Install NHL.TV on Kodi 17 Krypton
1. Launch Kodi and click on Add-ons.
2. Click on the Add-on Browser (box icon on the top-left corner).
3. Select Install from Repository and click on Kodi Add-On Repository
4. Select NHL.tv from the list and click on Install to proceed.
5. In a few minutes, the Add-on Enabled notification should appear to indicate that the add-on has been successfully installed.
6. Go back to your Kodi home screen and you should find the NHL.TV app by clicking on Addons –> Video Addons –> NHL.TV.
8. Congrats! You’ve successfully installed NHL.TV for Kodi. Launch the NHL.TV add-on to begin using it.
Note: You’ll need to enter your NHL.TV email and password manually – right-click or long-press on the NHL.TV app and select Settings.

Fox Sports Go
Fox Sports Go is another great addition for streaming sports. They provide live streams for some of the biggest sporting events including football, soccer, basketball, baseball, and many more. Fox Sports Go requires a paid subscription from an American cable provider in order to access their content. You’ll also need our VPN connection to the U.S to use Fox Sports Go.
Install Fox Sports Go on Kodi 17 Krypton
1. Launch Kodi and click on
Add-ons.
2. Click on the
Add-on Browser (box icon on the top-left corner).
3. Select
Install from Repository and click on
Kodi Add-On Repository
4. Select
Fox Sports Go from the list and click on
Install to proceed.
5. In a few minutes, the
Add-on Enabled notification should appear to indicate that the add-on has been successfully installed.
6. Go back to your Kodi home screen and you should find the Fox Sports Go app by clicking on
Addons –>
Video Addons –>
Fox Sports Go.
8.
Congrats! You’ve successfully installed Fox Sports Go for Kodi. Launch the Fox Sports Go add-on to begin using it.
Note: When launching Fox Sports Go for the first time, you will be presented a unique activation code which has to be entered at
www.Foxsportsgo.com/activate.

MLB.TV
MLB.TV is the go to place for everything baseball. MLB.TV requires a paid subscription in order to access their content. You’ll also need our VPN connection to the U.S to use MLB.TV.
Install MLB.TV on Kodi 17 Krypton
1. Launch Kodi and click on Add-ons.
2. Click on the Add-on Browser (box icon on the top-left corner).
3. Select Install from Repository and click on Kodi Add-On Repository
4. Select MLB.TV from the list and click on Install to proceed.
5. In a few minutes, the Add-on Enabled notification should appear to indicate that the add-on has been successfully installed.
6. Go back to your Kodi home screen and you should find the MLB.TV app by clicking on Addons –> Video Addons –> MLB.TV.
8. Congrats! You’ve successfully installed MLB.TV for Kodi. Launch the MLB.TV add-on to begin using it.
Note: You’ll need to enter your MLB.TV email and password manually – right-click or long-press on the MLB.TV app and select Settings.

NBA League Pass
NBA League Pass is the go to place for everything basketball. The paid service offers the International NBA League Pass version for non-US subscribers which avoids blackouts. Due to blackout restrictions, it’s better to connect to a VPN country outside of the US in order to watch full live games. Don’t have an NBA League Pass subscription yet? Learn how “hack” NBA League Pass for cheaper subscriptions and avoid blackouts.
Install NBA League Pass on Kodi 17 Krypton
1. Launch Kodi and click on Add-ons.
2. Click on the Add-on Browser (box icon on the top-left corner).
3. Select Install from Repository and click on Kodi Add-On Repository
4. Select NBA League Pass from the list and click on Install to proceed.
5. In a few minutes, the Add-on Enabled notification should appear to indicate that the add-on has been successfully installed.
6. Go back to your Kodi home screen and you should find the NBA League Pass app by clicking on Addons –> Video Addons –> NBA League Pass.
8. Congrats! You’ve successfully installed NBA League Pass for Kodi. Launch the NBA League Pass add-on to begin using it.
Note: You’ll need to enter your NBA League Pass email and password manually – right-click or long-press on the NBA League Pass app and select Settings.

Sportsnet Now
Sportsnet Now is a Canadian streaming service and is another great addition for streaming sports. They provide live streams for some of the biggest sporting events including baseball, basketball, ice hockey, American football, and many more. Don’t have a Sportsnet Now subscription yet? Sign Up here.
Install Sportsnet Now on Kodi 17 Krypton
1. Launch Kodi and click on Add-ons.
2. Click on the Add-on Browser (box icon on the top-left corner).
3. Select Install from Repository and click on Kodi Add-On Repository
4. Select Sportsnet Now from the list and click on Install to proceed.
5. In a few minutes, the Add-on Enabled notification should appear to indicate that the add-on has been successfully installed.
6. Go back to your Kodi home screen and you should find the Sportsnet Now app by clicking on Addons –> Video Addons –> Sportsnet Now.
8. Congrats! You’ve successfully installed Sportsnet Now for Kodi. Launch the Sportsnet Now add-on to begin using it.
Note: You’ll need to enter your Sportsnet Now email and password manually – right-click or long-press on the Sportsnet Now app and select Settings.
Music/Radio

SHOUTcast 2
SHOUTcast 2 is a free radio streaming service with more than 50,000 internet radio stations.
Install SHOUTcast 2 on Kodi 17 Krypton
1. Launch Kodi and click on Add-ons.
2. Click on the Add-on Browser (box icon on the top-left corner).
3. Select Install from Repository and click on Kodi Add-On Repository
4. Click on Music Add-ons and select SHOUTcast 2 from the list and click on Install to proceed.
5. In a few minutes, the Add-on Enabled notification should appear to indicate that the add-on has been successfully installed.
6. Go back to your Kodi home screen and you should find the SHOUTcast 2 app by clicking on Addons –> Music Addons –> SHOUTcast 2.
8. Congrats! You’ve successfully installed SHOUTcast 2 for Kodi. Launch the SHOUTcast 2 add-on to begin using it.

Spotify (previously known as Spotimc)
Spotify is one of the best music app in the world. With a library of millions of songs, this is one music app you can’t miss. Spotify requires a paid subscription in order to access their library. Don’t have a Spotify subscription yet? Sign Up here.
Install Spotify on Kodi 17 Krypton
1. Firstly, you’ll need to download the
Spotify Repository to your device in a folder you can easily find later.
2. Then, launch Kodi and click on
Add-ons.
2. Click on the
Add-on Browser (box icon on the top-left corner).
3. Choose
Install from Zip File and locate the Spotify Repository file you had just downloaded to install.
5. In a few minutes, the
Add-on Enabled notification should appear to indicate that the add-on has been successfully installed.
6. From the same Add-On Browser menu, select
Install from Repository –>
Kodi Emby Beta –>
Music Addons.
7. Click
Spotify to install.
5. In a few minutes, the
Add-on Enabled notification should appear to indicate that the add-on has been successfully installed.
6. Go back to your Kodi home screen and you should find the Spotify app by clicking on
Addons –>
Music Addons –>
Spotify.
8.
Congrats! You’ve successfully installed Spotify for Kodi. Launch the Spotify add-on to begin using it.
Note: You will be required to enter your Spotify login details when you first launch the add-on.

Apple iTunes Podcasts
Apple iTunes Podcasts is a free streaming service for audio and video podcasts.
Install Apple iTunes Podcasts on Kodi 17 Krypton
1. Launch Kodi and click on Add-ons.
2. Click on the Add-on Browser (box icon on the top-left corner).
3. Select Install from Repository and click on Kodi Add-On Repository
4. Click on Music Add-ons or Video Add-ons and select Apple iTunes Podcasts from the list and click on Install to proceed.
5. In a few minutes, the Add-on Enabled notification should appear to indicate that the add-on has been successfully installed.
6. Go back to your Kodi home screen and you should find the Apple iTunes Podcasts app by clicking on Addons –> Music Addons –> Apple iTunes Podcasts.
8. Congrats! You’ve successfully installed Apple iTunes Podcasts for Kodi. Launch the Apple iTunes Podcasts add-on to begin using it.
Pictures

Photo App
The Photos App allows users to show their Apple Photo App library on Kodi. After reading the library, users can browse categories as you would on your Mac computer.
Install Photo App on Kodi 17 Krypton
1. Launch Kodi and click on Add-ons.
2. Click on the Download.
4. Click on Picture Add-ons and select Photo App from the list and click on Install to proceed.
5. In a few minutes, the Add-on Enabled notification should appear to indicate that the add-on has been successfully installed.
6. Go back to your Kodi home screen and you should find the Photo App by clicking on Addons –> Picture Addons –> Photo App.
8. Congrats! You’ve successfully installed Photo App for Kodi. Launch the Photo App add-on to begin using it.
Note: The plugin needs to know where your Photo library is before being able to display them. Please enter the correct path in the plugin’s settings. You can change the plugin’s settings by going to the Add-on manager from Settings –> Add-ons –> Enabled Add-ons –> Your add-on category (Pictures in this case) –> Your add-on title (Photo App in this case) –> Configure.
Is Kodi Legal?
The simple answer is, yes. Kodi is an open source software designed to stream content on a range of devices. In it’s released state, it’s 100% legal. However, over the years people have been using it for more malicious reasons. For example, there exist such a thing as “Kodi Boxes” which are sold by developers that have customised their boxes to access pirated Premier League football streams. It has even prompted the UK government to issue a warning on illicit streaming devices and caused Kodi to crackdown on illegal add-ons.
Just last year, Brian Thompson, the now infamous Kodi box seller pleaded guilty to charges for selling the devices and advertising them for sale. These so called “Kodi boxes” allowed users to not just access pirated sporting events but also movies and TV shows.
So it’s also very important for you to do some research on the add-on you’ll be using – it’s still a perfect software for a media centre but just be careful to not use it illegally by trying to access pirated streams.
We hope you found this article informative and useful. Please feel free to share it with your friends or family that wants to get the best out of Kodi too!
If you need any help, our support team is just an email away at [email protected] and we’ll try our best to assist you.
Related Posts
Update: 7th June 2019, Friday
Sixth game ends with the Bruins winning by (5-1), watch […]
Update: 8th June 2019, Saturday
It's time for the men's finals this Sunday with […]
The latest version of Apple's macOS operating system used in their desktop and laptop […]
VPN Protocols
If you use a VPN, or just started looking into them, you have probably […]