OK, please bear in mind that we are techies, so this is easy for us. However, while this may not appear easy to you, it is fairly straightforward and as long as you follow our instructions, you should be fine.
Before going any further, you should already have a working OpenVPN connection set up on your computer and you should be able to connect to our service using this without any problems.
The instructions below are based on Windows 10. However, it should be the same for Windows 8.1 and Windows 8.
If you’re trying to set this up in Windows 7, please refer to our instructions below instead:
Windows OpenVPN Auto Start (Windows 7)
Getting Started
The VPN connection needs to change your computer’s network routes and this requires Administrator privileges. Because of this, you cannot simply put it in your start-up folder.
To work around this issue, we need to create a scheduled task and tell it to auto start with Administrator privileges.
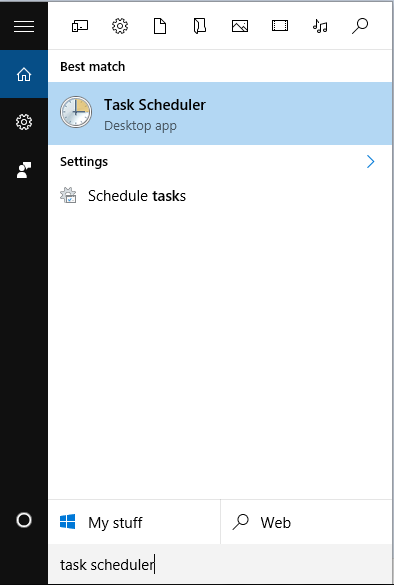
Press on the Windows Key + Q on your keyboard and search for Task Scheduler and open that program.
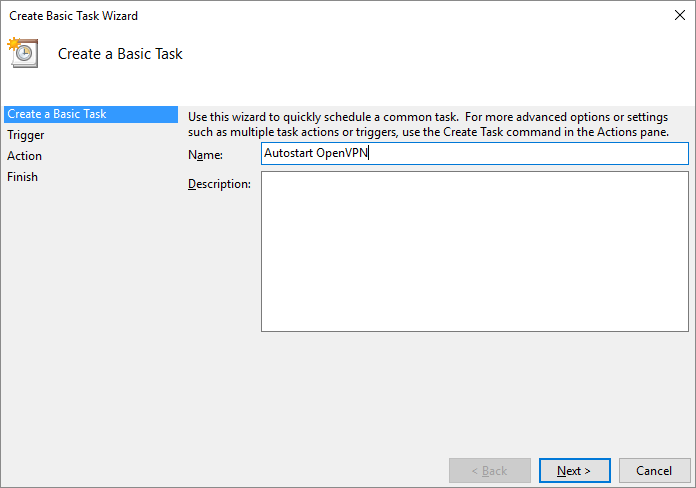
Click on Create Basic Task from the Actions menu on the right hand side.

Schedule Task Configuration
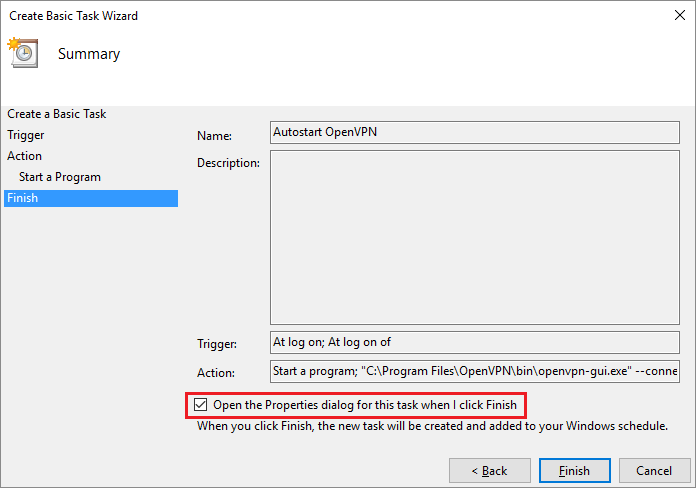
You need to give the new task a name, call it something like Autostart OpenVPN and then click Next.
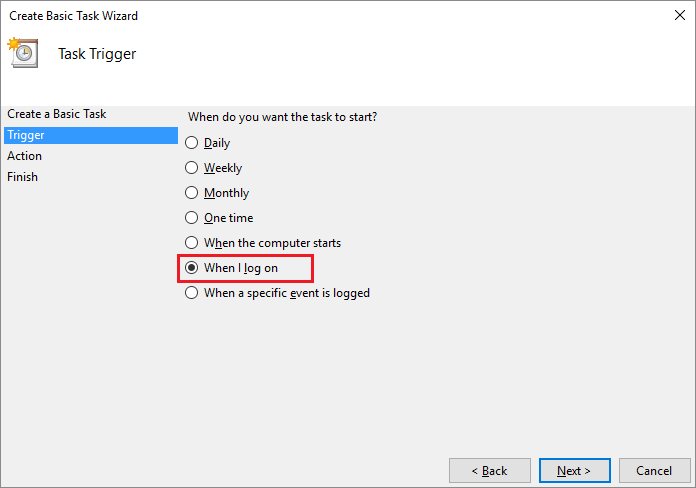
Set the Trigger
On Trigger, set it to start When I log on.
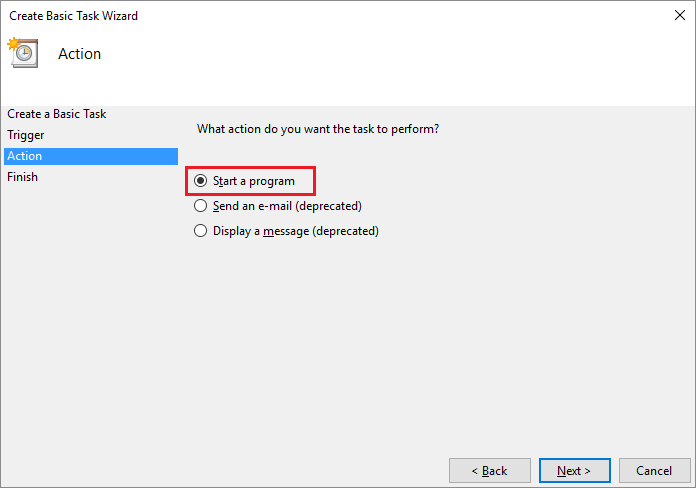
Choose the action
Under Action, click on Start a Program and then click Next.
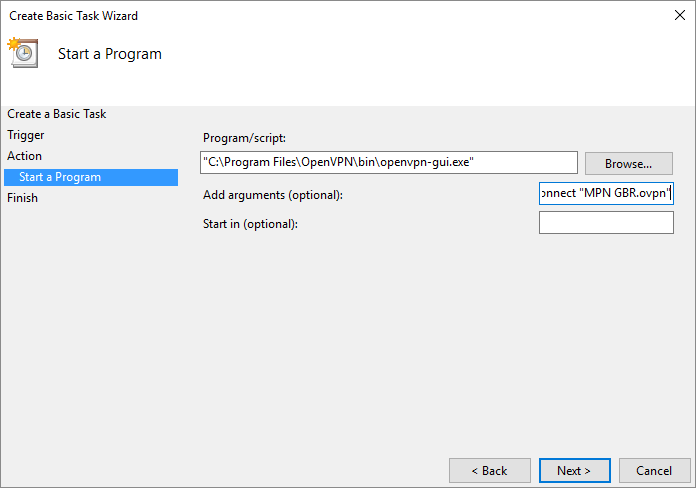
Select the OpenVPN application (openvpn-gui.exe) , by default this should be in;
C:Program FilesOpenVPNBin
NOTE: The latest version of our OpenVPN Application (updated May 2017) installs on the same location regardless of whether your system is a 32bit or 64bit Operating System.
If you are our older version of the app, we highly suggest that you reinstall the latest one from our website.
Otherwise, you can find the application (openvpn-gui.exe) from the location below:
C:Program FilesOpenVPNBin on a 32 bit system
and
C:Program Files (x86)OpenVPNBin on a 64 bit system.
In the add arguments field, add
--connect "MPN GBR.ovpn"
and click on Next.
Summary
On the Summary page, click the option to Open the Properties dialogue for this task when I click Finish.
Click Finish.
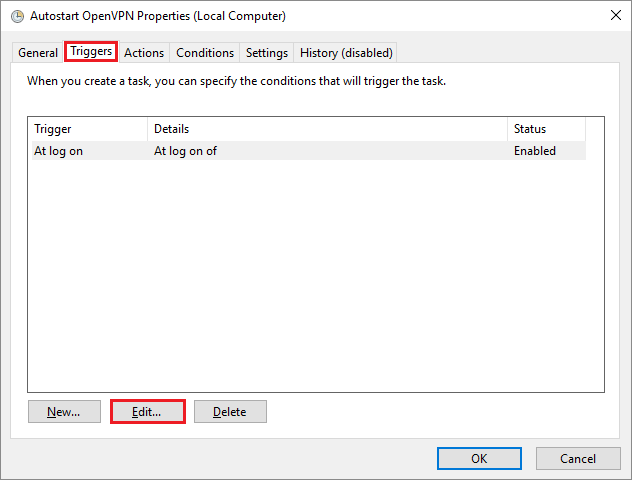
Set the privileges
On the Advanced Properties page, select the checkbox that says Run with highest privileges.

Delayed Startup
Click on the Triggers tab at the top and then click the Edit button.
In the Advanced settings section, click on the check box next to Delay Task for: and change the delay to 30 seconds.
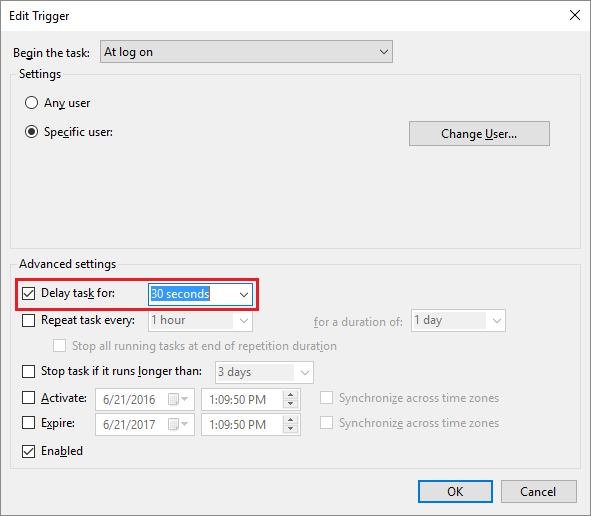
This allows all your other Windows processes to start first, if you do not do this, you may not see the OpenVPN icon, so we recommend it. Click on OK, and then click on OK again.
You are done
That’s it, reboot and it should automatically connect to our servers 30 seconds after you log in.