The LEDE Project (“Linux Embedded Development Environment”) is a Linux operating system specifically for routers, founded as a spin-off of the OpenWRT project and share many of the same goals.
While most of the functions and steps are very similar to the standard OpenWRT, there are few differences, mainly on fixing the shortcomings of the OpenWRT development. For more details on the LEDE Project, you can refer to their About Page here
The steps below were tested on LEDE (Chaos Calmer) running set on a Linksys E1200 router that has the luci app openvpn plugin on site, so it might not be same on your firmware.
Ensure the router is able to get Internet connection and working fine before attempting to set up the VPN.
Step 1 – Update and install OpenVPN client package
Login as root to the router via SSH using Terminal, or a client of your choice i.e PuTTY
By default, the address is 192.168.1.1 but it might differ to yours. If you do not know the address of your router refer to the instructions lined below:
How To Find Your Default Network Gateway
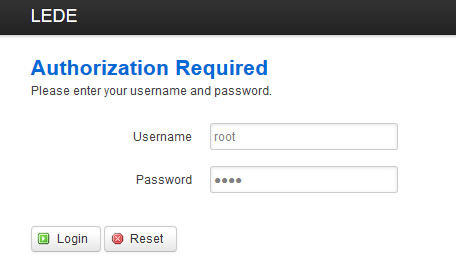
The default username and password are both set as root
Ensure your package is up to date on your system. Run the command below:
opkg update
Install the OpenVPN client package:
opkg install openvpn-openssl luci-app-openvpn
Confirm OpenVPN package is installed on the system and check the version using a single command:
openvpn –version

Note: To use our connection, you will need to ensure that the OpenVPN version is from 2.3.4 onwards
Head to /etc/openvpn/
Create a file called tls-auth.key
vi tls-auth.key

enter the lines below and save it.
-----BEGIN OpenVPN Static key V1-----
2ddab7577aeb0db94b5ea9582350cc0d
8fab59f737760b0e8f8c59bae72c32bf
651d40afa0976c18d2539c7d38281aae
f4ec2fd06736a22a79651cae7945ee87
93132619a0690bf6f09e8a2317b8ffd5
ea62a667a5a5511d4ddd83b847bd7490
0f039e2c007f49e647b9cac891acb8f1
dffc82a98ddcde2dd1da01d38ab5dbfc
8ab4e4ff647871fc80b4d0d6baa0525b
8b0ccac5d04e34cdf463d8534cddf800
3c7c145eb8661370fa99abb714c2cdcf
82cd78ad7ddbeb329aa72893b06996a3
6572d34020769e828340c16c7021ce08
5e97252a733b2c1191c920d6287759ee
569ab30421edde9cae1a873aa2d54768
67f662cff1f6c38aff7c9d0cfa189c58
-----END OpenVPN Static key V1-----
Next, create a file called user.txt
vi user.txt
Enter your MPN Username and Password on the first line and the second line respectively and save it.
MPN Username
MPN Password
Take note of the full location of the files as you will need to input them later.
/etc/openvpn/tls-auth.key
/etc/openvpn/user.txt
Next, download the ca file into your computer to be used later.
Step 2 – Create OpenVPN configuration
Login to the router’s Luci Web panel from your browser.
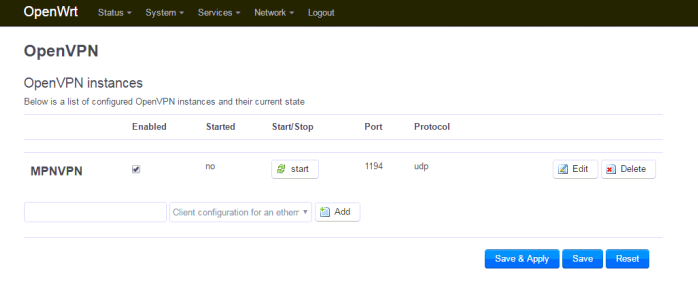
Navigate to Services > OpenVPN
Create a new instance named MPNVPN and select the 3rd option from the drop-down: Simple client configuration for a routed point-to-point VPN.
Click Add.
Click on Switch to advanced configuration at the top right corner of the page to start configuring the OpenVPN connection.
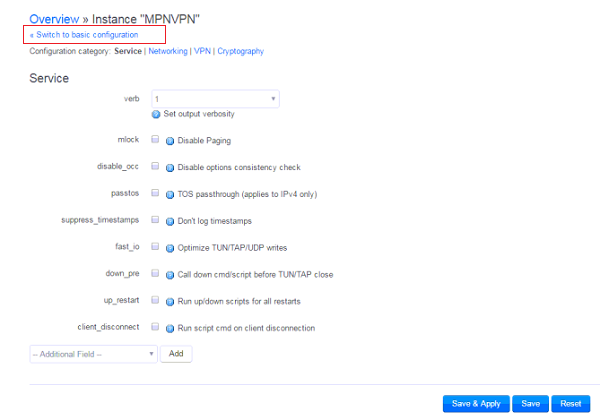
Under the Services tab, just ensure verb is set to 1
Click Save.
Next, click on the Networking tab
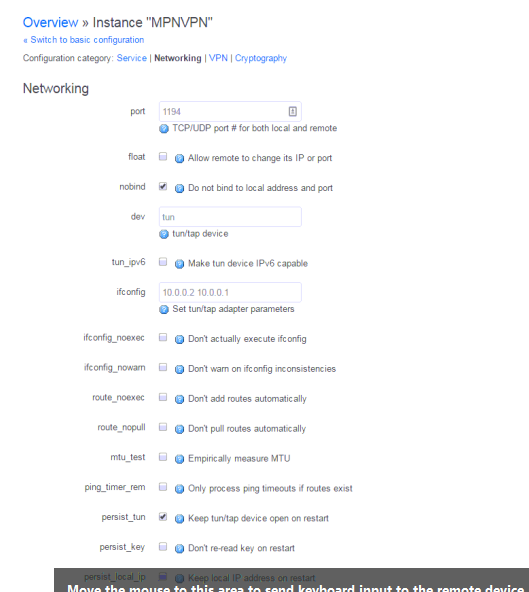
Ensure these details are as below, leave others as it is.
port : 1194
nobind : Checked
persist_tun : Checked
Note: If the stated field is not there, scroll down and select it from the Additional Field drop down and click Add
Click Save.
Once that is done, click on the VPN tab.
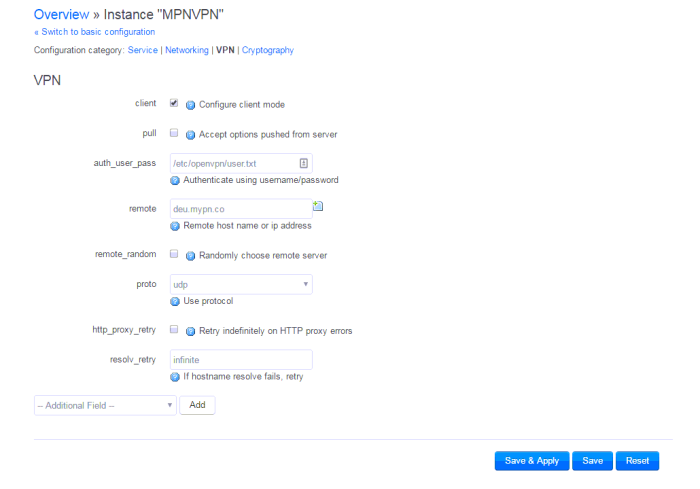
Ensure these details are as below, leave others as it is.
client : Checked
auth_user_pass : /etc/openvpn/user.txt
remote: gbr.mypn.co
proto: udp
resolv_retry: infinite
The example above is set to connect to our GBR servers i.e. gbr.mypn.co . If you are subcribed to a different plan or wish to connect to another country, please refer to the full list of server names that you can connect to from our Knowledge Base Article.
Note: If the stated field is not there, scroll down and select it from the Additional Field drop down and click Add
Click Save.
Select the Cryptography tab
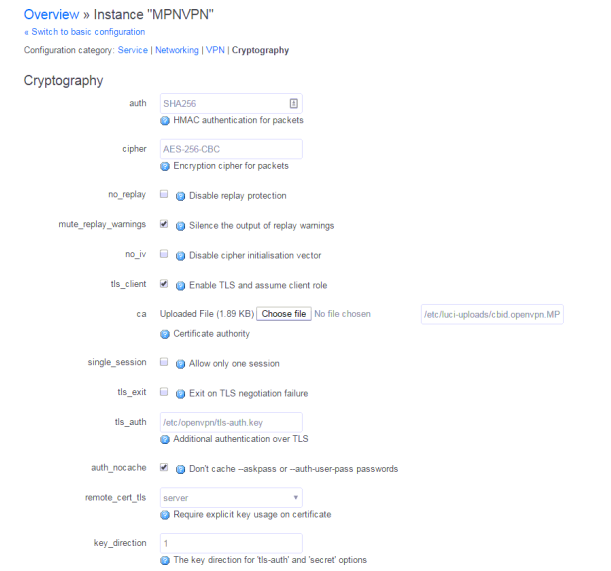
Ensure these details are as below, leave others as it is.
auth: SHA256
cipher: AES-256-CBC
mute_replay_warnings: Checked
tls_client: Checked
ca: Upload the CA file that you downloaded earlier
tls_auth: /etc/openvpn/tls-auth.key
auth_nocache: Checked
remote_cert_tls: server
key_direction: 1
Note: If the stated field is not there, scroll down and select it from the Additional Field drop down and click Add
click on Save & Apply.
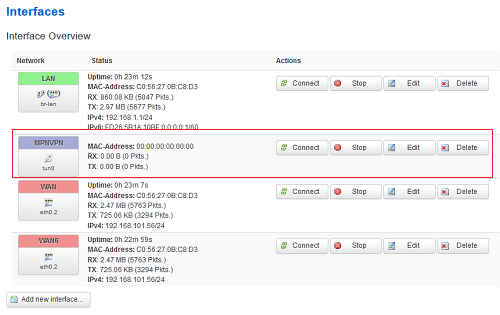
Step 4 – Create the VPN Interface
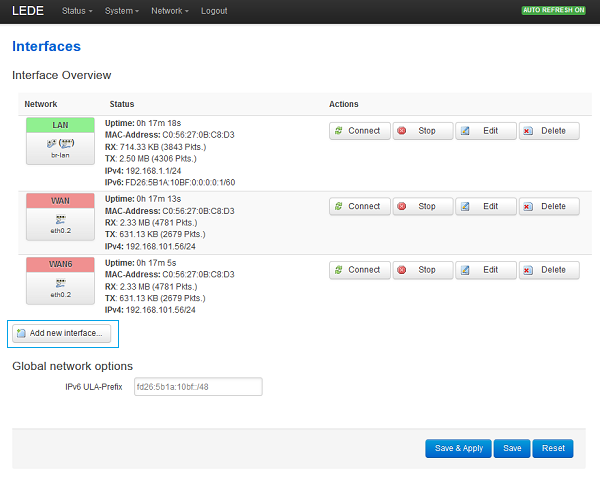
Navigate to Network > Interfaces
Click on Add New Interface
 Enter the details as below:
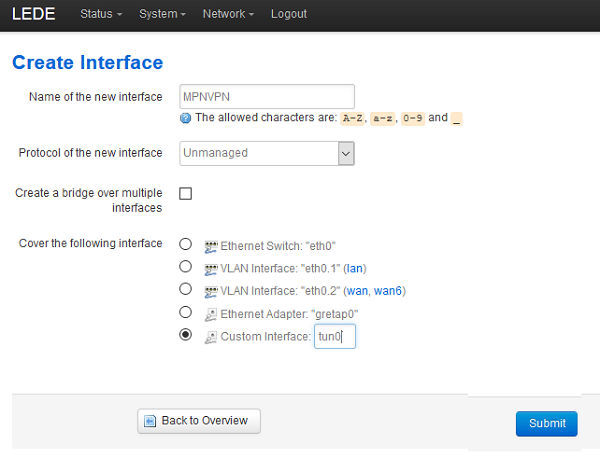
Name of the new interface: MPNVPN
Protocol of the new interface: select Unmanaged from the drop down menu
Cover the following interface: Custom Interface – tun0
Click Submit.
Step 5 – Set the Firewall rule for the VPN connection
Navigate to Network > Firewall
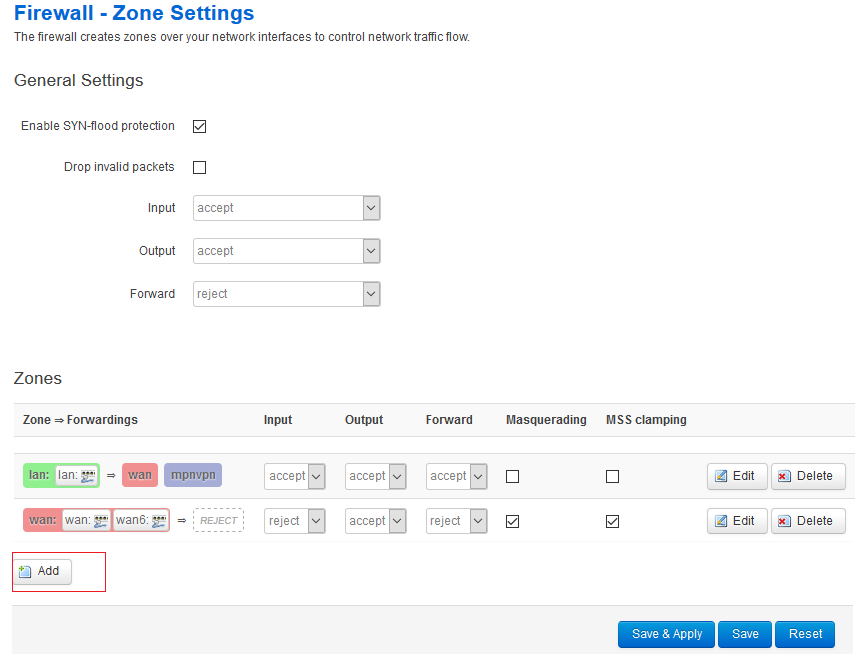
Click Add.
Configure the firewall as below.
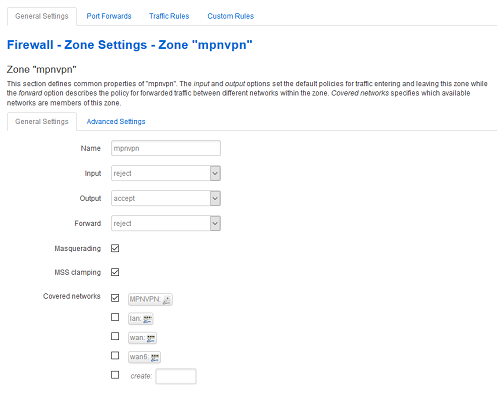
Name: MPNVPN
Input: reject
Output: accept
Forward: reject
Masquerading: Checked
MSS clamping: Checked
Covered networks: Select MPNVPN
For Inter-Zone Forwarding;
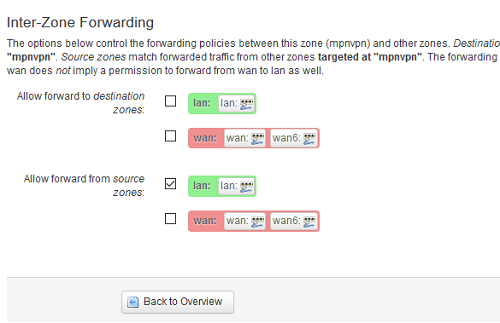
Select Allow forward from source zones
lan : Checked
wifi : Checked (if you have wifi interface configured)
Once that is done, click on Save & Apply.
Head back to Network > Interfaces to assign the new firewall rule to the VPN Interface.
Click on Edit for MPNVPN and head to the Firewall Settings tab.
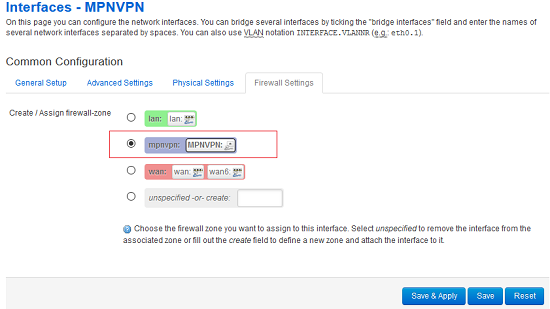
Select MPNVPN for the assigned firewall zone and click on Save & Apply.
Step 6 – Connection complete
MPN VPN is now configured in your OpenWRT router!
Go to Services > OpenVPN, check the box for Enabled next to MPNVPN, then click the Start button to initiate the connection.
The connection should be completed within seconds, once connected you can confirm this by heading to our IP Info page to check on your location.
Alternatively, you can head to Network > Interface and the VPN Interface that you created earlier should already have a VPN IP assigned.
Any Problems?
If you are unable to access the Internet when the VPN is connected, look through the Firewall settings again and ensure it’s set correctly before trying again.
If you are unable to connect to the VPN, navigate to Status > System Log and contact us ([email protected]) with the latest connection log so we can get an idea where this is failing.