Whilst we recommend our MPN VPN Manager app to automate the VPN connection on your Apple iOS devices (iPhone or iPad), there are situations where the connection might fail. In this case, you can use our alternative VPN connection via the OpenVPN app by following the steps in this guide.
Remember, you need an existing internet connection to connect to My Private Network. Make sure your iPhone is connected to the internet and that you are able to browse the web.
Step 1: Download OpenVPN Connect App.
Tap on the App Store icon on your iOS Home Screen.
![]()
Tap on Search, type in OpenVPN Connect and install the app. The app should appear on your screen as shown below.
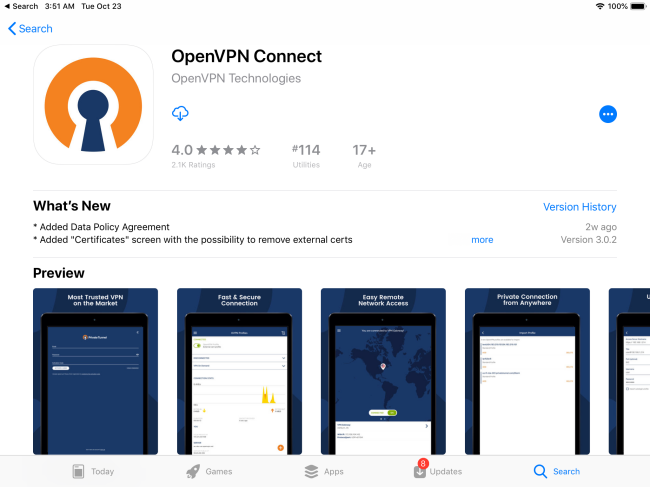
Tap on the Free button or the Cloud icon (if you have downloaded it before) to download and install the application.
Alternatively, just tap the Apple App Store icon below to download the app. Please ensure you’re tapping the icon below while using your iOS browser, or you’ll need to connect your iPad or iPhone to your computer to transfer the app to your device.

Step 2: Downloading OpenVPN configuration file(s)
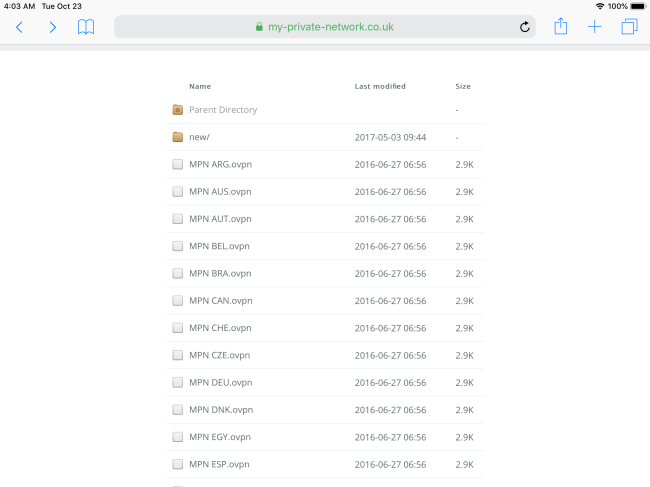
Open the Safari browser on your device and go to https://www.my-private-network.co.uk/files/osx/UDP1194/ and tap on the configuration file(s) for the countries that you want to connect to. In this example, I’ve chosen MPN GBR.ovpn which will allow me to connect to our United Kingdom servers.
For a detailed list of server names, please refer to our complete list of servers.
Your iOS device should recognise the file and give you the option to Open in OpenVPN app, choose this.

Step 3: Installing OpenVPN configuration file(s)
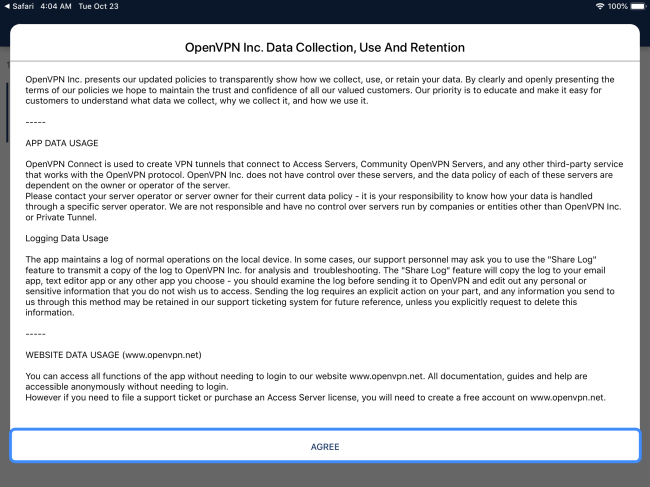
The OpenVPN app will open and you will have to agree to the license and terms, click on AGREE.
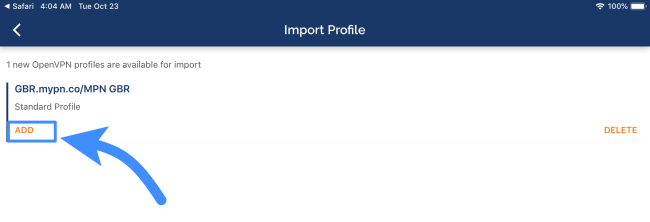
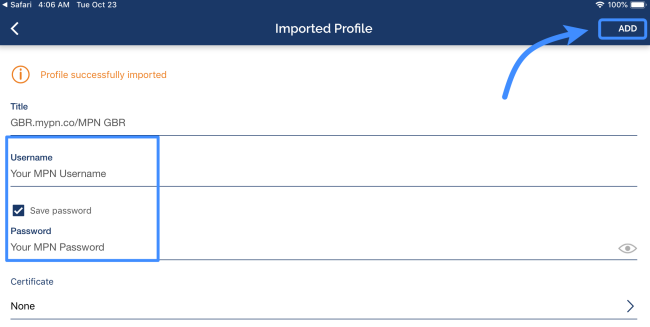
The app will show that 1 new OpenVPN profiles are available for import, click on ADD.
Tap on Username and enter your My Private Network username. Tap on the Save password checkbox and then tap on Password and enter your My Private Network password. Once that is done, tap on ADD in the top right corner.
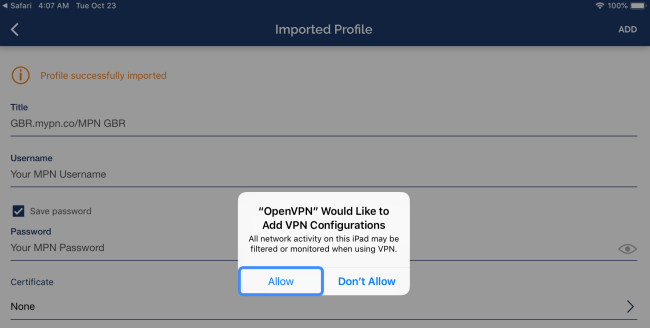
You will be prompted to allow OpenVPN to save the profile, tap on Allow, you may also need to provide your device’s Passcode or Touch ID.
Step 4: Connecting to VPN
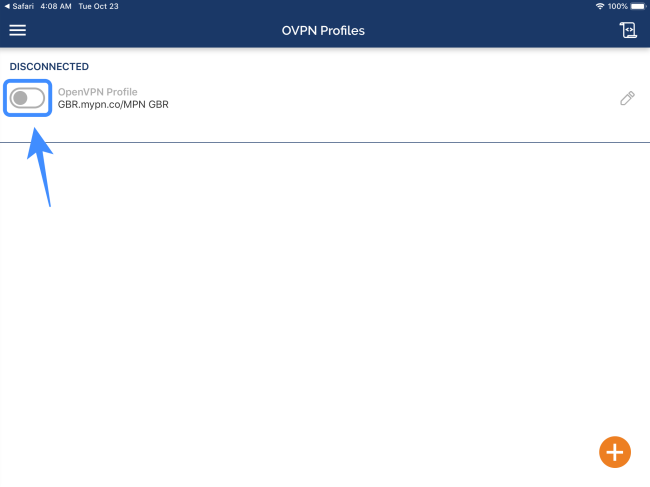
Now that the VPN profile has been saved, you will be returned to the Profile menu, you should see the profile you just added, it should be called GBR.mypn.co/MPN GBR (or any other country that you’ve saved), to the left is a toggle switch which controls the connection. Tap on the toggle to connect to the VPN.
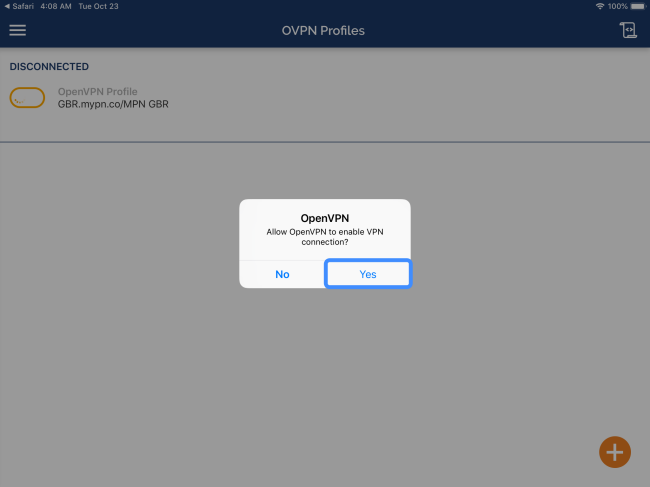
You may get one final alert asking if OpenVPN can connect, tap on Yes.
The toggle will now indicate that you’re connected. In addition, you will also see the VPN logo at top right of your iOS screen. You can also manage the connection from the iOS settings menu.

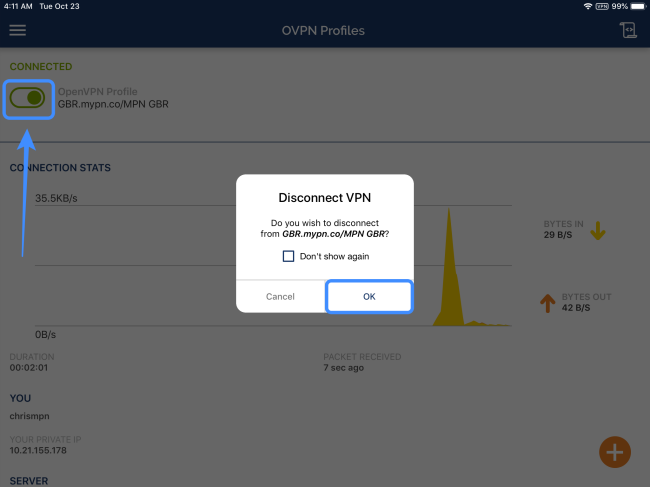
Disconnecting from the VPN
Simply tap on the toggle again and when you been prompted to disconnect, tap on OK.
Tips
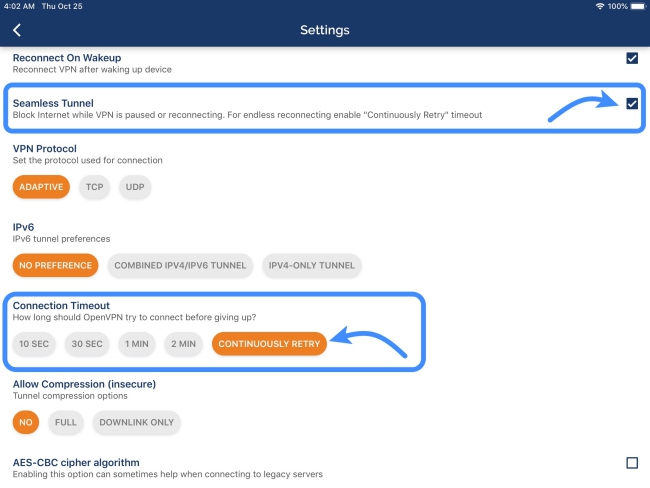
In the OpenVPN Settings menu there are a few options to tweak your connection, most of the defaults are fine, but depending on your needs, you may want to enable the Seamless Tunnel option and set the connection timeout to Continuously Retry. This will block any internet activity that is not over the VPN and keep the VPN connected across Wi-Fis and switching between mobile and WiFi.
Any Problems?
Unfortunately it doesn’t always go to plan!
If you have any problems or can’t get connected, please email us at [email protected]. We’ll get back to you as soon as possible and try to help.
Alternatively, you could give our other VPN protocols a try on your iOS device to circumvent the issues you’re experiencing. Follow the links below to setup the alternative VPN protocols: